Apparently my dog costume making skills preceded me and I
was approached with a challenge of making dragon wings (Game of Thrones style but adaptable for a cream and rose princess dress if the 2 y/o human counterpart refused to dress as Dany) for
an Italian greyhound. My original thought was cellophane like the bee wings but
I needed something more leathery looking and lightweight. After a little online
scouting I saw that Modge Podge actually dried into a flexible material that
had a bit of a leathery texture to it. I did a small test wing with some wire
and a little bit of paint in the Modge Podge. I could definitely work with
that! So if you want to make your own little dragon this year I’ve laid out my
final process after some trial and error.

What You’ll Need:
Thick florist wire
White florist tape
Modge Podge (I went with the Antique Matte finish)
2 sheets of felt that match your dog’s fur color (more if
you have a medium or large sized dog)
1 sheet of craft foam
About 18 inches of Velcro
Faux fur, marabou boa, or some scaly looking fabric
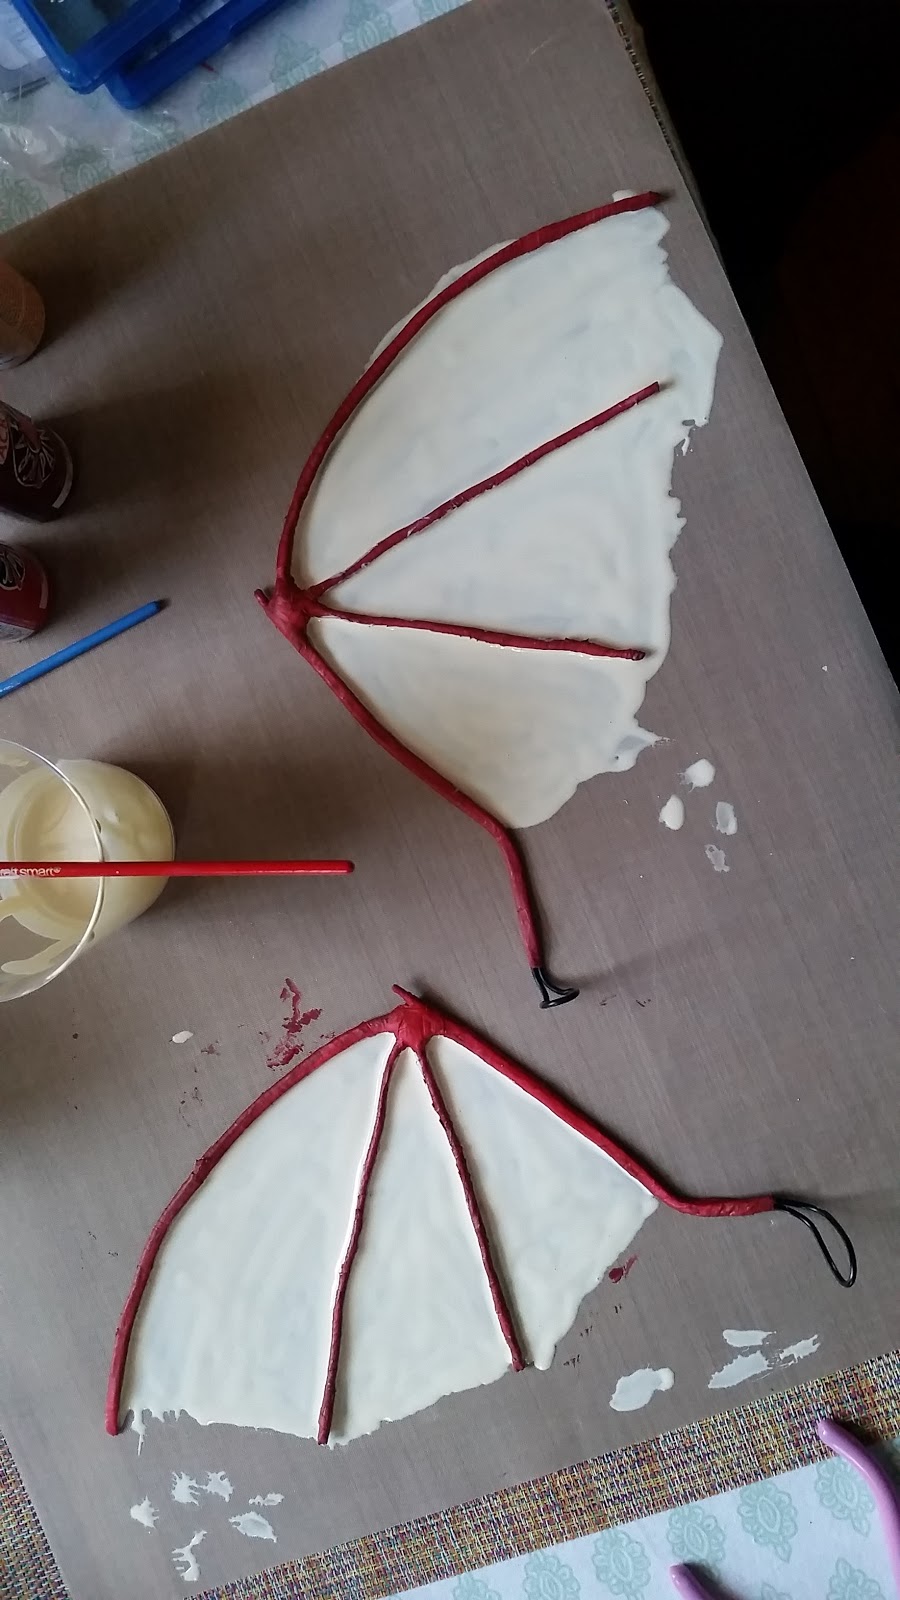
Making the Wing Frame
I played with several wing designs and settle on one that
was more organic than the cartoonish, the spokes acting as fingers. I wanted to have a solid wing with no
breaks at the joint so I used a single piece of wire for this design. The first end was one of the 2 middle spokes, I bent it back down to make the outer spoke then doubled back all the way to the base of the wing "arm" where i left some extra to form a base, doubled back again and finished the other inner spoke. The wire never crossed over itself and it gave the outside edge a good thickness for strength.

Using the florist wire pulled taunt I wrapped the wires tightly starting at the base then worked towards the middle where I secured the intersections of the wires as tightly and securely as possible. Then I made my way down each spoke, doubling back and thickening the "palm" of the wing. When the tape overlaps tightly it gives it some texture and looks like the leg of a bird.


I decided to make a little thumb by rolling up some of the florist tape and then securing it to the palm of the wing by wrapping the loose end several times until it blended well. This way its a soft thumb and not a wire edge that could snag or poke.


If you want the bones of your wing to be a different color than the webbing now is when you paint them. It's a lot easier than trying to paint them after. Once your wings are dry lay them out as flast possible on a nonstick surface, I used a cheap a craft mat.

Filling in the Wings
Pour some of your Modge Podge into a cup and add paint color unless you want your wings clear. **Do not paint afterwards** The paint will crack, especially when you shape the wings. Pour inbetween the spokes and spread it out with a paint brush making sure to push it under the spokes so there are no gaps. Brush it out as evenly as possible, making sure it isn't too thick and avoiding covering the spokes.

It's going to take a day or so to dry completely so just leave it out of the way and don't mess with it.
Once dry you can carefully peel it off the mat and inspect it for thin spots by holding it up to the light. Also check for gaps under the spokes you might've missed. I did an additional thin coat of the Modge Podge paint mixture on both sides just to make sure it was evenly opaque. The webbing started to pucker and warp when I did, which I actually liked, but it dried and flattened back out.

Wait again for it the wings to dry. During this time I highly suggest you make another Modge Podge mix with paint the color of the bones to fix any little mistakes and seal it. You can also painted lines for the spokes on the underside of the wings otherwise the color of the spokes won't show through
.

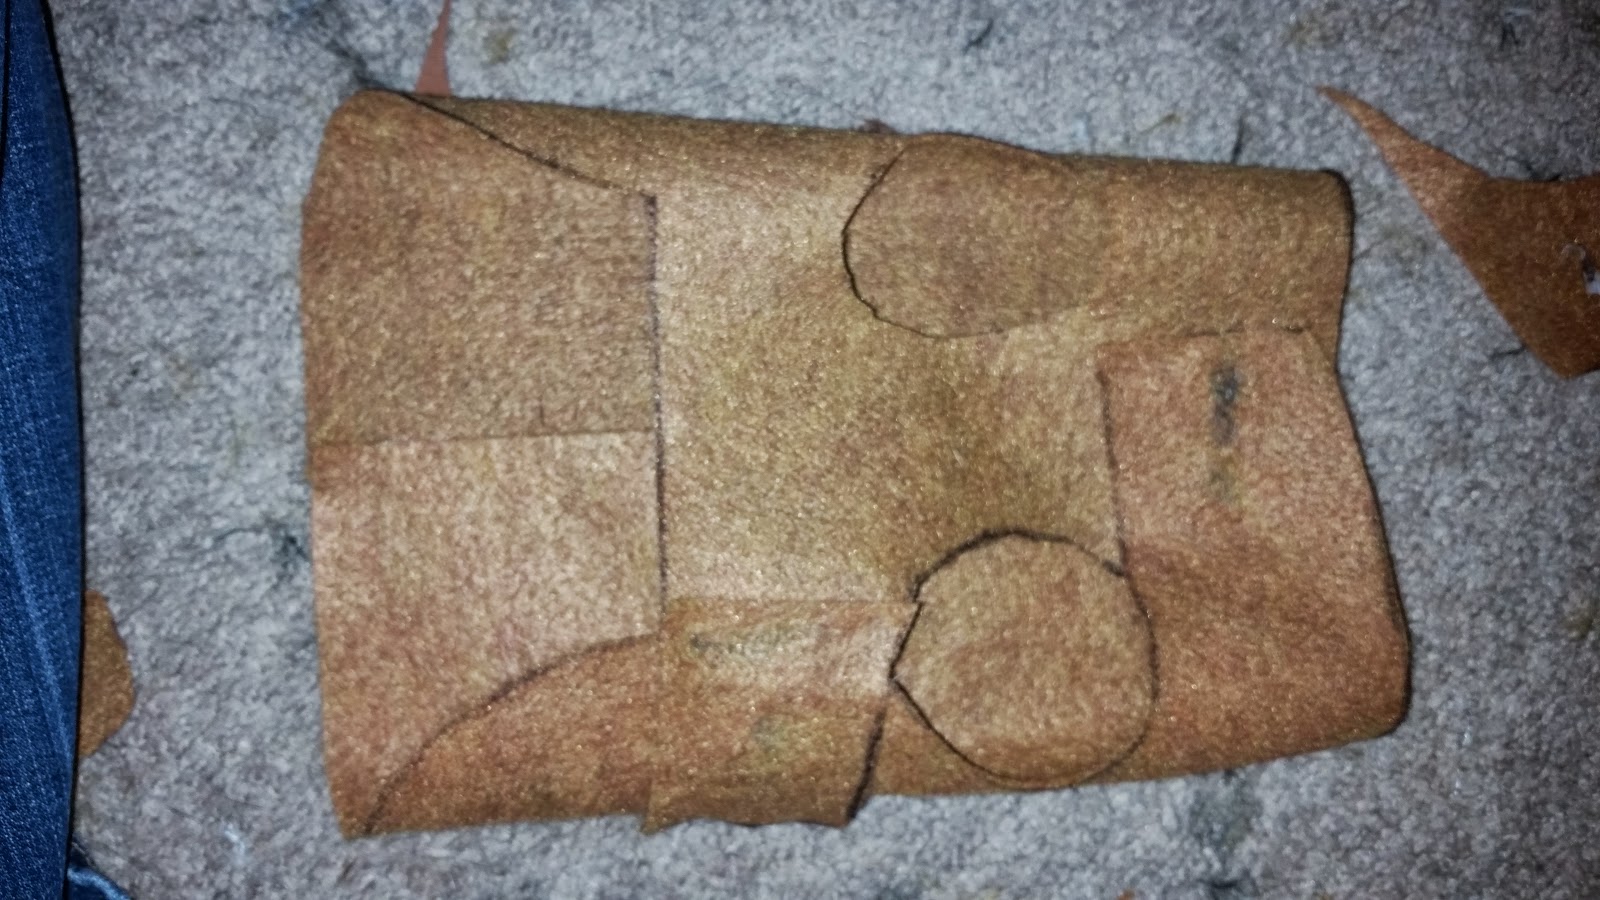
Making the Vest
This part is copied from my Spider Dog tutorial. The vest can be shorter for the the dragon wings and the lovely thing about felt is you can cut and glue where you need to expand or take it in without much fuss.
Start by hot gluing the two pieces of felt together at the ends with a small seam.

Take a piece of clothing that fits your dog snuggly and trace it out onto the felt. I used a raincoat that laid flat with 2 points of attachment- one across the chest and one under the torso. Wherever there need to be more felt I just took a scrap and glued it to the edge.

Use velcro for the attachment points and Cut out the arm hole.

Making the Wing Base
I prefer to make the wings detachable from the vest but if you don't mind it being all one piece I'll throw in some alternate directions.
Cut two matching rectangular pieces of foam, about 6x 3 inches, and round the corners. Bewtween 1/3rd and 1/2 way down is where you're going to glue the wing bases on the first piece of foam.**If you aren't going to make your wings detachable then cut two slits in your felt where the wings will go and thread the bases through before the next step** I snipped mine so they fit in with each other and then just piled on the hot glue so they wouldn't move. With your 2nd piece of foam estimate the point where the wings bases are and make two long cuts up to those points. This will cover up your mound of glue and add some extra stability.


Hot glue the two pieces of foam together once you have them lined up properly.
**If you are not making your piece detachable and its threaded through the vest then you can glue the top of the foam to the inside of the vest.** To attach the wings to the vest add 2 lengthwise strips of velcro to the underside of your foam sheet base. Line up the other halves of the velcro on the back of the vest and you are good to go.

Covering the Wing Base
To cover up the bases this is where you'd add the fur, marabou, or scaly type of material. You can just cover the base or go all out and cover the whole vest, whatever floats your boat! I decided to justmake a strip of fur going down this dragon's back since I wasn't sure if this dog would be comforatble with a lot going on. I cut a piece of faux fur slightly wider than the foam base and long enough to go from his neck to past the vest. I glued the edge to the underside of the vest neck so the hair would stand up a bit.

I pulled the fur back to the wing bases and cut a couple slits in from the side for the wings to come through.

I also decided to taper the back so I drew out my cut lines and cut the fabric part ONLY. Don't cut the fur, it'll just look choppy.

Once pulled over the wings you can leave it or add some velcro to keep it from shifting.
The Final Product

Shaping the wings is pretty easy, I arched mine out and closed them in a bit so the webbing wasn't pulled flat. Play around, you'll find what works best. I made these for a dog I hadn't met so I don't like that I didn't get the vest coloring closer and I should probably tighten up the chest attachment with some more velcro. Other than that I think it looks pretty good and he did really with them on, a few shakes didn't loosen anything and the wings held strong as he walked around the store. I'm glad I made them detachable because it's a lot easier to keep his vest on and just pull the wings off when he heads for narrow spaces that could bend or possibly tear them. He's set for Halloween regardless of whether he accompanies a fairy princess or Daenerys Targaryen down the street for trick or treating. I think this process would work well for wings of any size with just some changes to wire gauge. Overall I consider it a success!


