Pages

Saturday, February 27, 2016

Making a No-Sew Pillow Sham


I'm not a big fan of the overly matchy-matchy bed sets so for awhile I've been trying to figure out what to use for pillow shams that would go with our multi-colored, nebula duvet cover. Not finding anything I really liked I finally saw some cute pillowcases online that sparked an idea. With some embroidery flourishes and added details I could make some regular pillowcases into the shams.


What I Needed:

  • Embroidery hoop
  • Embroidery thread and needle
  • Pom fringe (or any other kind of fringe)
  • 4 fabric squares (Each wider than half the case width so they overlap in the middle and slightly longer to create a hem)
  • Hem tape 
  • Iron and ironing board
  • Scissors
Embroidery
The first thing I did was decide what parts if the case i wanted to embroider. For the bear case it was the flowers and some designs, for the fox it was sections of the tail and the eyes and nose. I stitched through only the single layer of fabric so the threads will be hidden away in the final product. There are lots of amazing crewel embroidery techniques but I decided to keep it pretty simple with the basic ones I already knew. For the flower I decided to use french knots to fill in the center of the flower and a satin stitch consisting of a thread color mix for the petal details:


I wanted to make sure my satin stitched wouldn't get loose and snag so when I finished I weaved a single thread through the strands to keep it from pulling.


After realizing how long the embroidery was going to take I decided to cut down on my ambition for the majority of the fox tail and just picked a few sections to satin stitch and again mixed thread colors to match as close as I could:


Backing
Luckily I already had a set of quilting squares I got as a set from a fabric store that would work perfectly with these pillowcases. I decided a center insert slot with two pieces of fabric of alternating colors and patterns. I used the hem tape to create a nice clean edged on all the pieces that would be where the pillow insert opening is:


I doubled folded the edge so the loose threads would be hidden and once I pinned where the hem was going to go I ironed it lightly to keep the creases:


Next I laid a strip of the hem tape under the fold and then ironed it on both sides according to the instructions. My iron has a steam setting and that's what really made the tape melt and adhere.


Pom Fringe
Before I began to add the fringe I closed up my pillowcase opening with a length of hem tape to keep all the rough embroidery threads on the underside concealed.


Originally I was going to use different colors for each sham but decided that since I used yellow in both already that I'd make the fringe the same color. I measured out the lengths of fringe and tape for each side and then cut the tape lengths up the middle to attach the fringe to the back of pillowcase as close to the edge as possible:


Once the whole pillow case was done I again measured out lengths of hem tape but didn't split them this time. On a short side I lined up the hem tape on top of the fringe, again as close to the edge as possible:


Attaching the Backing
I laid the raw edge of my backing fabric (opposite the hemmed edge for the opening) on top of the fringe, good side down, as lightly as possible and making sure none of the hem tape was exposed. Going a few inches at a time to keep it lined up, I sealed it with the iron:


At the corners I folded in as much as possible so the corners would stay neat and continued with the first backing piece on all three sides. When I did the second piece I layered it on top of the first where they overlap.


*In hindsight I should've tucked the first piece into the hem of the second to make it neater but now I know for next time*

Because I knew the corner on the top piece was going to have some added stress I decided to use some embroidery thread to make a little decorative stitch through both backing pieces for reinforcement.


Finished Products
I was pretty pleased how each sham turned out and they ended up coordinating pretty well:


I think the embroidery details were a really nice touch to make them look like more than just pillowcases. I've always loved crewel embroidery and was lucky enough to have my grandma teach me how to get started but it's not too hard to learn if you hit up you tube and practice with some basic patterns. It's a great way to add a little bit of a personal touch from pillows to tea towels, sweaters, scarves, or sheets.


- Geek Girl Friday

Thursday, November 12, 2015

A Geek Girl's Favorite Things

Every year Oprah puts out a list of her favorite things and sends retailers and O fans into a tizzy as they all rush to keep up with the supply and demand of products blessed by Oprah herself. I can't help but feel like Oprah and I don't have a whole lot in common (crazy right?) and that some of her favorite things aren't really geared towards the likes of a Geek Girl such as myself. So I decided to put together a list of my favorite things that Oprah may want to consider next year (no pressure!). Consider these for your next "Treat Yo-self" day or as gift ideas for your favorite geek. Nobody is paying me to thumbs up this stuff (you can if you want, I'm not stopping you) so here is my unbiased list of Favorite Things:

Geek Magazine
Nothing quite like having a magazine to casually flip through while your e-reader is charging. Unlike most other magazines I probably read most if not all of the articles in this one. There's something for every shade of geek and nerd out there.

Ultra Sabers
In case you haven't heard, there's a new Star Wars movie coming out. Just a little indie film... no biggie.... Anyhow, if you have been fangirl frothing at the mouth since you saw the first teaser trailer you know that having your own lightsaber is a MUST. I got my first Ultrasaber at Dragon Con several years ago and marveled at the selection of hilts and blade colors to choose from. They custom made it for me right there and when I finally got it in my hot little hands it was all I could do to not swing it around and make the noise I've been making since I was a little girl dueling my brother with wrapping paper tubes. 

My original Ultra Saber!

Amazon Echo
Turning on your lights by hand is so 2014. And looking outside to check the weather? Pffft. Alexa, as she is named, is a total indulgence but I love her so. She tells me Trump jokes and has witty retorts when I ask her for "Tea. Earl Grey. Hot". She plays my music and apologizes when I get mad at her for not being able to answer my questions. I can't hold it against her for long though, when she dims the lights and we watch Walking Dead all is forgiven.

Is a movie really a "thing"? Anyhow, this mockumentary about vampire flatmates in New Zealand was frikkin brilliant and for the first time in years I saw a movie at the theater more than once. Get the DVD, download it, whatever it takes, but watch this movie because it is hilarious and is spawning a sequel that I'm going to do a little dance for.

Google Cardboard
If you can't wait for an Oculus Rift or don't have that kind of budget then get yourself one of these for WAY cheaper. It turns your smartphone into a VR simulator and there are all kinds of apps to make you dizzy or scare the crap out of you. My favorite was the Insidious 3 trailer made for VR. It's a lot of fun watching people experience it too.
Experiencing another world via carboard


Vegan Doc Martens
People are REALLY surprised to find out these aren't real leather, they're by far the best looking faux leather shoes I've come across. There are also patterned canvas boots as well as velvet that are all cruelty-free.


Custom Converse Sneakers 
Speaking of shoes... I generall flip from Docs to Chucks depending on the season, what can I say- I'm not a strappy sandal/ spike heel kinda lady. When the zombie apocalypse happens I'll be ready to outrun the girls teetering in platform shoes! Anyhow, you can customize your own Chucks from eyelets to canvas pattern, to the stitching color. In the grads scheme of womens' shoes these aren't too badly priced for some one-of-a-kind shoes.

I'm big on having no regualr lightbulb action going on for my Halloween parties and LED light strips have been an incredible way to make my parties really stand out. They are adhesive and pretty sturdy, come in all colors, and give off an excellent glow. If you really want to up the ante on your next party then just get a few of these and put them under tables or chair rails for a really cool effect.


BerkshireSweet Gold Maple Syrup
If you want to taste some nectar of the gods this stuff is as close as you're going to get. Waffle Sundays wouldn't be complete without a set of these syrups that go from light to dark, each their own little blissful flavor. My mother was using "maple flavored" syrup in a plastic squeeze bottle until I got her some of this for Xmas and she'll never go back.

There's A Map For That Necklace
Again, ModCloth. I know sometimes the clothes and shoes are hit or miss because of sizing but jewelry will always fit. If you want a statement piece that won't break the bank or be too blingy this one is pretty cool. I wear it to work pretty often (seeing as we make maps) and get lots of compliments.
There's a Map for That Necklace in Silver - Silver, Solid, Good, Variation, Casual, Travel, Statement, Quirky, Scholastic/Collegiate, Silver, Best Seller, Graduation, 4th of July Sale, As You Wish Sale, Top Rated, Gifts2015, Exclusives

Mountain Majesty Coat
This is by far the prettiest coat I own (as well as the most expensive). It's so elegant though and I get so many compliments on it. It's also nice and heavy, I'm pretty sure if I fell off a dock while wearing it I'd sink like a stone. Even if it's not available anymore ModCloth has the coolest coats and jackets of anywhere I've looked.
Ready to get my swing on
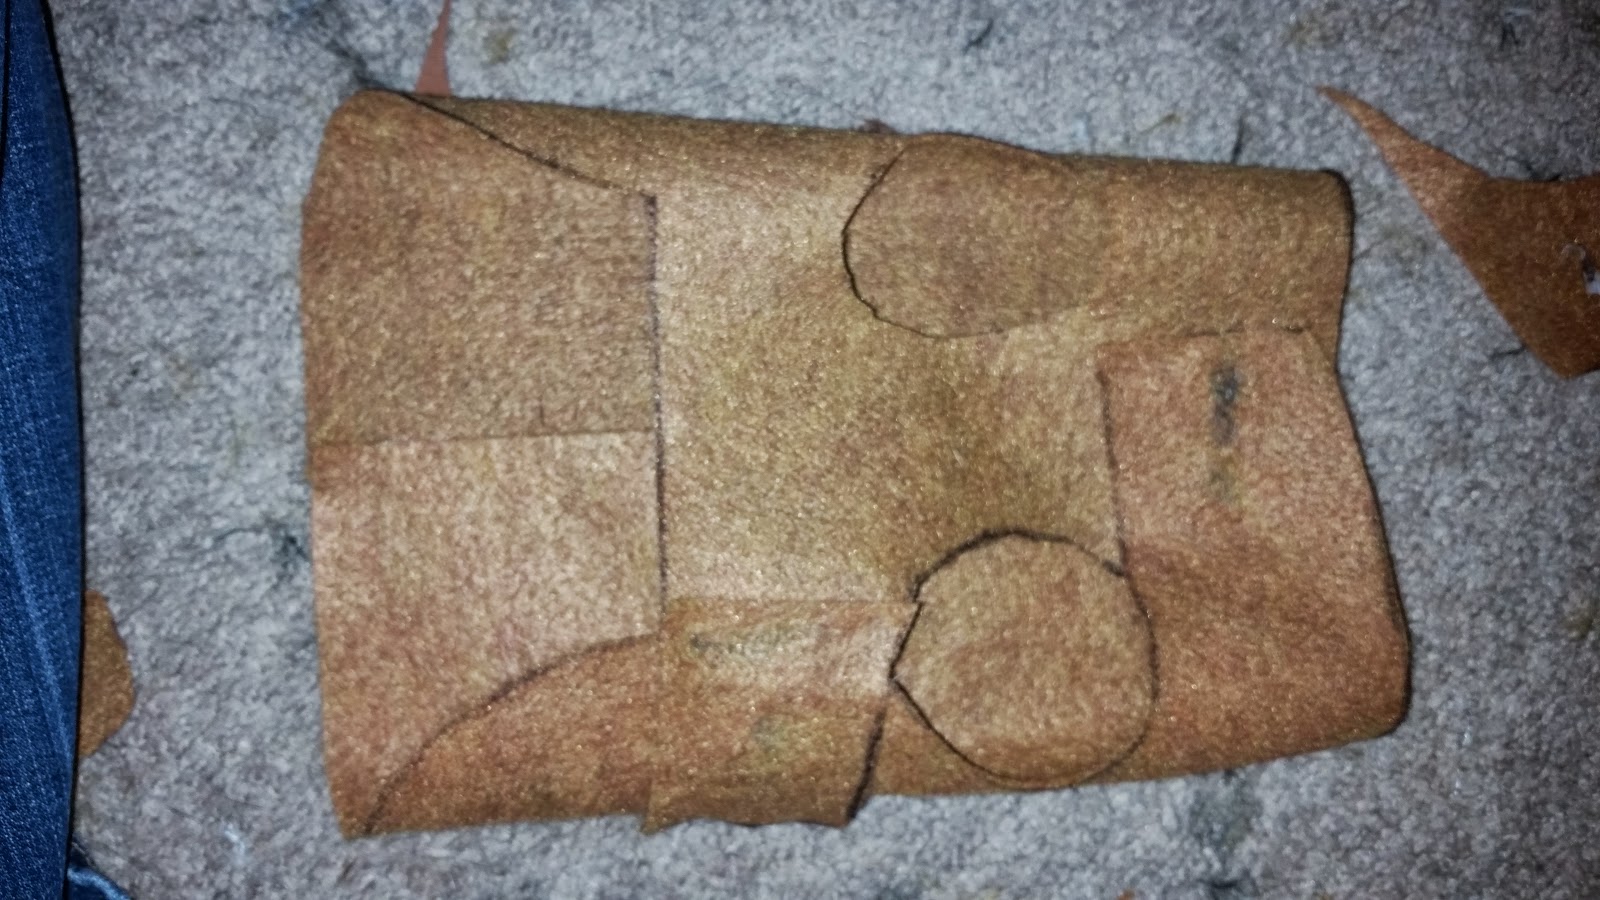
Horrible Adorables
Forget real taxidermy, that's just plain creepy. These are colorful, whimsical critters made of felt and I can't help but buy one every year that she shows up at the local craft show.
Kaleidoscopic Bungo

Spaghetti Kiss T-Shirts
My boyfriend has some of these in multiples and he is constantly asked where he got them. They're very cool and subtle designs in robots and sea creatures, a little something for everyone.
Patrick Stewart approved!

Claymonster Pottery
Another artist I'm constantly hitting up at craft shows. All of her pieces make me smile and they've made great gifts that always get a good laugh. I've probably gotten one of everything for myself at this point (soap dispensers, spoon rests, cookie jars, etc.) and am going to need to get a larger home so I can expand my monsters.


Tanner Gallery Paintings
When we were wandering New Orleans on a trip a few years ago we came across this Gallery and just loved the depth and haunting qualities to his paintings of forest scenes that are layered in progressively darker or lighter shades. Maybe Oprah can get herself an original but we settled for some prints which I still stop and look at fairly often.


Sticky Fingers Cookbook
For those that aren't lucky enough to live near Sticky Fingers Bakery in DC you can get fat in your own home with this cookbook full of baked goods (vegan!) that have done battle on "Cupcake Wars" and won. I bribe coworkers with cakes from this cookbook and I now have people fighting over who wants to do my crapwork so they can pick out a cake for me to bake.


Tauntaun Sleeping Bag
This was originally a joke product for April Fools day but I guess enough people (like yours truly) are "foolish" enough to want one REALLY badly. I zip myself in this on the couch in the winter with my dog buried in next to me and delight that it doesn't smell bad on the inside OR outside. Think Geek actually has more amazing stuff than I can list so just trust me and do all your Xmas shopping there.
Starla keeping the tauntaun warm for me

Tideline Salvage
Rats, Bats, and Vultures! This guy makes art with pieces of nature that he's scavenged and used to pay honor to much maligned creatures by making him the centerpieces of his art. I haven't got it in me to get one of his "roaches" made of shells but I've got several vultures, a rat, a bat, and a face on the shell of a horseshoe crab that I think are all just lovely.


Aerial Yoga
I am not an athletic girl (obviously) so I prefer the solo forms of work out that are the opposite of CrossFit and Soul Cycle. I decided to give aerial yoga a try on vacation since I do yoga at home and I'd heard the aerial version is great for those of us who aren't rubber jointed and have bad backs. I. LOVED. IT. Not only did I get a better stretch but it was actually pretty fun and took me back to my monkeybar days. Unfortunately the local studio uses the "silks" which dig into me pretty painfully but the studio I went to in Florida used more of a parachute type material and had handle straps. One day I will have a home where I can hang one of these without breaking the ceiling of kicking the TV...
Aerial yoga with a bad back

Bruce Campbell's "If Chins Could Kill"
I love me some Evil Dead/ Army of Darkness and with "Ash vs Evil Dead" on Starz I recently pulled out my autographed copy of this book to flip through again. If you have ever wanted to know what it's like to be Bruce Campbell then you might as well go to the horse's mouth. He is pretty groovy.


"Harpo Speaks!" by Harpo Marx
I have read this book several times in my life and I will likely read it several more. If you have any interest in the Algonquin Roundtable crowd, old Hollywood, or just enjoy some good storytelling then I highly recommed this book. Harpo Marx was the silent brother often overshadowed by Groucho but wow, when he puts words to page I just couldn't get enough. Through Harpo I found so much more to read about and my romance with the film, literature, and arts of the early 20th century began.

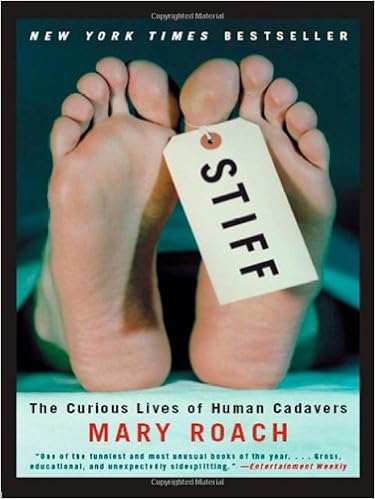
"Stiff: The Curious Lives of Human Cadavers"
Mary Roach has written some of the most obscure yet interesting as hell books I've ever read. Stiff remains my absolute favorite and I find myself recommending it and immediately following it with "no, no, I swear its really good!". If going to see the "Bodies" exhibit doesn't make you squirm so much as lean in fascinated them check out this book about all the amazing things you could do after death. Yeah its a little macabre but I guarantee you'll be much more engrossed in this book than any science lesson you had in school.
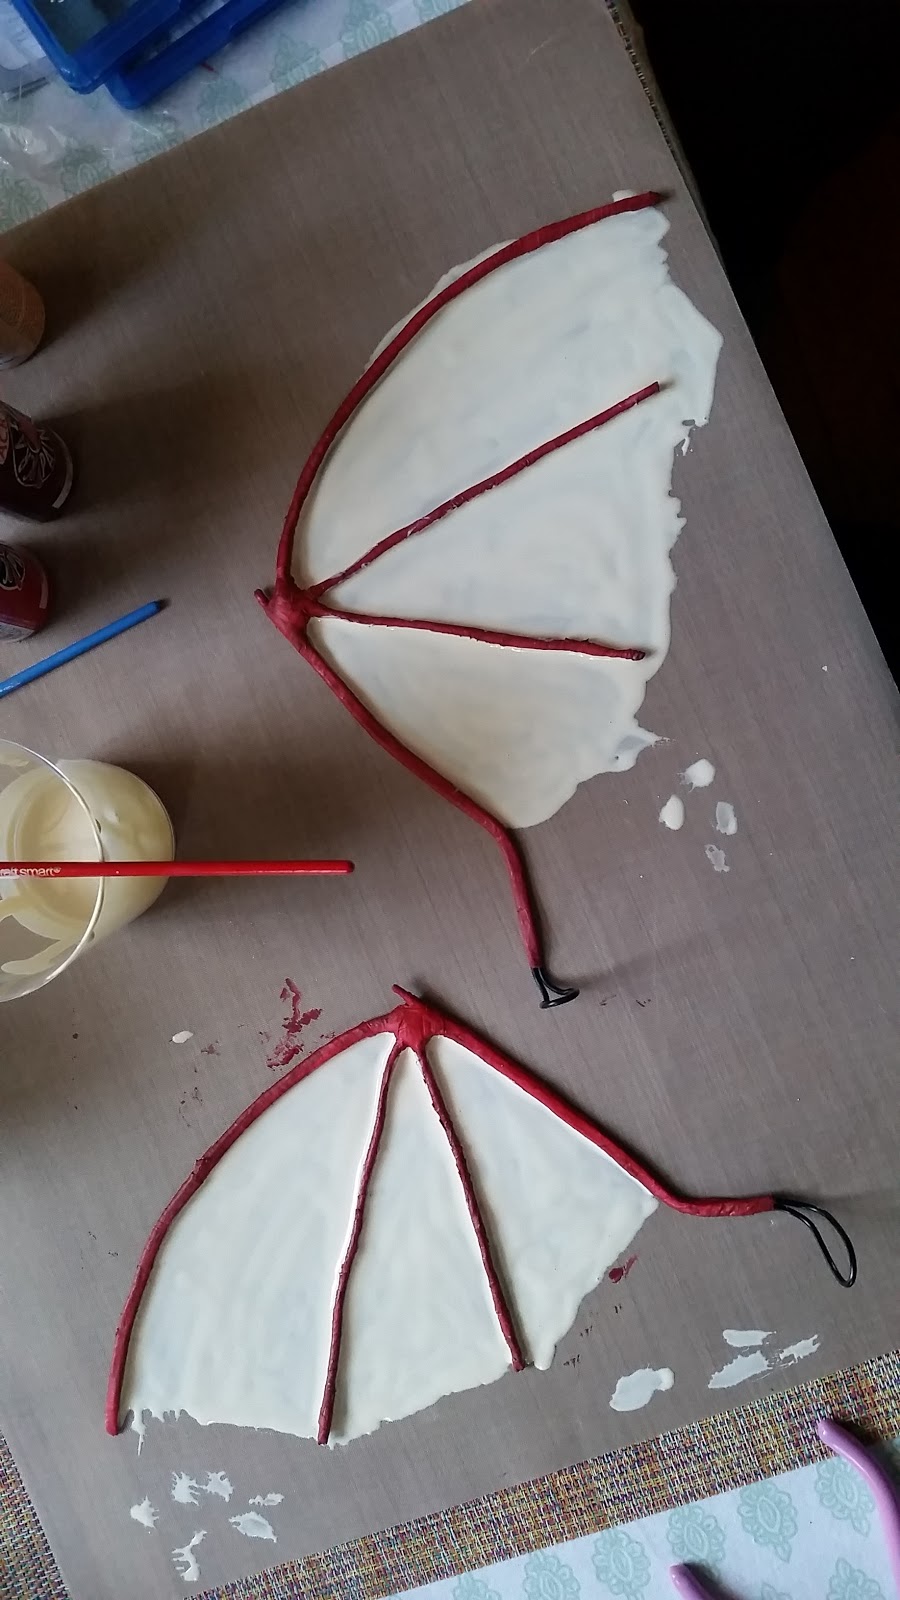

Fantastic Plastic
These little suckers are pretty handy for a crafter. You heat them up in water and they're ready to be squished together and molded into just about anything. I've used them to cast prosthetic molds, make little additions to my niece's dollhouse, and frankly it's fun to play with. It hardens within 10 minutes and its reusable if you make a mistake so what's not to love?

Used FP on molding clay impressions to create bites made of latex

This case has been perfect for storing all my FX makeup essentials from brushes to latex to my air brush and molding clay. It may not be the sturdiest case out there but for the amateur ghoul-makers out there it gets you what you need without emptying your wallet on a hobby.

Ben Nye Makeup
I first started using Ben Nye products in my college theater days and it had maintained my loyalty ever since. It just does not budge and they have a little bit of everything whether you're going for FX or something dramatic for a photoshoot. I even used it on my cousin for her outdoor wedding in the disgusting Florida heat. Despite a 110 heat index and lots of dancing she didn't look like a melted raccoon during the reception. Ben Nye saved the day!
A little nose wax coverd and blended with basic Ben Nye makeup

Bee Folks Hand Cream
My skin cracks and flakes from the constant purell use at work and scrubbing the paint and glue off my hands at home. This beeswax based cream is thick, smells great, and works amazingly well. I even smear it on my face in the winter because my delicate Florida skin can't take the cold air. Looking pretty good for my age and I'm going to go ahead and attribute that to this stuff.

Dazzle Dry and LVX Nail Polishes
I always love funky color nail polishes but they would inevitably chip and peel until I looked like I'd been working a street corner for too long. I got samples of the toxin and cruelty free polishes and holy manicure Batman! I can go about a week with nails that don't look like a middle schoolers when I use the Dazzle Dry base coat and LVX polish and top coat. And I craft, am clumsy, and constantly use my nails to peel off apple stickers. And the colors are pretty fantastic too, I've slowly been amassing a decent selection. So if you're like me and prefer to paint your own nails on Sunday nights before Walking Dead then I can't recommend these brands enough


So there you have it, some of Geek Girl Friday's favorite things. Not quite on Oprah's level but at least geared more towards those (like me) that couldn't find anything on Oprah's list they were dying to put on their own Christmas list.

Wednesday, October 14, 2015

Making Dragon Wings (For a Dog)

Apparently my dog costume making skills preceded me and I was approached with a challenge of making dragon wings (Game of Thrones style but adaptable for a cream and rose princess dress if the 2 y/o human counterpart refused to dress as Dany) for an Italian greyhound. My original thought was cellophane like the bee wings but I needed something more leathery looking and lightweight. After a little online scouting I saw that Modge Podge actually dried into a flexible material that had a bit of a leathery texture to it. I did a small test wing with some wire and a little bit of paint in the Modge Podge. I could definitely work with that! So if you want to make your own little dragon this year I’ve laid out my final process after some trial and error.


What You’ll Need:
Thick florist wire
White florist tape
Modge Podge (I went with the Antique Matte finish)
2 sheets of felt that match your dog’s fur color (more if you have a medium or large sized dog)
1 sheet of craft foam
About 18 inches of Velcro
Faux fur, marabou boa, or some scaly looking fabric


Making the Wing Frame

I played with several wing designs and settle on one that was more organic than the cartoonish, the spokes acting as fingers. I wanted to have a solid wing with no breaks at the joint so I used a single piece of wire for this design. The first end was one of the 2 middle spokes, I bent it back down to make the outer spoke then doubled back all the way to the base of the wing "arm" where i left some extra to form a base, doubled back again and finished the other inner spoke. The wire never crossed over itself and it gave the outside edge a good thickness for strength.


Using the florist wire pulled taunt I wrapped the wires tightly starting at the base then worked towards the middle where I secured the intersections of the wires as tightly and securely as possible. Then I made my way down each spoke, doubling back and thickening the "palm" of the wing. When the tape overlaps tightly it gives it some texture and looks like the leg of a bird.


I decided to make a little thumb by rolling up some of the florist tape and then securing it to the palm of the wing by wrapping the loose end several times until it blended well. This way its a soft thumb and not a wire edge that could snag or poke.


If you want the bones of your wing to be a different color than the webbing now is when you paint them. It's a lot easier than trying to paint them after. Once your wings are dry lay them out as flast possible on a nonstick surface, I used a cheap a craft mat. 


Filling in the Wings

Pour some of your Modge Podge into a cup and add paint color unless you want your wings clear. **Do not paint afterwards** The paint will crack, especially when you shape the wings. Pour inbetween the spokes and spread it out with a paint brush making sure to push it under the spokes so there are no gaps. Brush it out as evenly as possible, making sure it isn't too thick and avoiding covering the spokes.


It's going to take a day or so to dry completely so just leave it out of the way and don't mess with it. 


Once dry you can carefully peel it off the mat and inspect it for thin spots by holding it up to the light. Also check for gaps under the spokes you might've missed. I did an additional thin coat of the Modge Podge paint mixture on both sides just to make sure it was evenly opaque. The webbing started to pucker and warp when I did, which I actually liked, but it dried and flattened back out.


Wait again for it the wings to dry. During this time I highly suggest you make another Modge Podge mix with paint the color of the bones to fix any little mistakes and seal it. You can also painted lines for the spokes on the underside of the wings otherwise the color of the spokes won't show through
.


Making the Vest

This part is copied from my Spider Dog tutorial. The vest can be shorter for the the dragon wings and the lovely thing about felt is you can cut and glue where you need to expand or take it in without much fuss. 
Start by hot gluing the two pieces of felt together at the ends with a small seam.


Take a piece of clothing that fits your dog snuggly and trace it out onto the felt. I used a raincoat that laid flat with 2 points of attachment- one across the chest and one under the torso. Wherever there need to be more felt I just took a scrap and glued it to the edge.


Use velcro for the attachment points and Cut out the arm hole.


Making the Wing Base

I prefer to make the wings detachable from the vest but if you don't mind it being all one piece I'll throw in some alternate directions.

Cut two matching rectangular pieces of foam, about 6x 3 inches, and round the corners. Bewtween 1/3rd and 1/2 way down is where you're going to glue the wing bases on the first piece of foam.**If you aren't going to make your wings detachable then cut two slits in your felt where the wings will go and thread the bases through before the next step** I snipped mine so they fit in with each other and then just piled on the hot glue so they wouldn't move. With your 2nd piece of foam estimate the point where the wings bases are and make two long cuts up to those points. This will cover up your mound of glue and add some extra stability.


Hot glue the two pieces of foam together once you have them lined up properly.

                                     
**If you are not making your piece detachable and its threaded through the vest then you can glue the top of the foam to the inside of the vest.** To attach the wings to the vest add 2 lengthwise strips of velcro to the underside of your foam sheet base. Line up the other halves of the velcro on the back of the vest and you are good to go.


Covering the Wing Base

To cover up the bases this is where you'd add the fur, marabou, or scaly type of material. You can just cover the base or go all out and cover the whole vest, whatever floats your boat! I decided to justmake a strip of fur going down this dragon's back since I wasn't sure if this dog would be comforatble with a lot going on. I cut a piece of faux fur slightly wider than the foam base and long enough to go from his neck to past the vest. I glued the edge to the underside of the vest neck so the hair would stand up a bit.


I pulled the fur back to the wing bases and cut a couple slits in from the side for the wings to come through.


I also decided to taper the back so I drew out my cut lines and cut the fabric part ONLY. Don't cut the fur, it'll just look choppy.

                                                       
Once pulled over the wings you can leave it or add some velcro to keep it from shifting. 


The Final Product


Shaping the wings is pretty easy, I arched mine out and closed them in a bit so the webbing wasn't pulled flat. Play around, you'll find what works best. I made these for a dog I hadn't met so I don't like that I didn't get the vest coloring closer and I should probably tighten up the chest attachment with some more velcro. Other than that I think it looks pretty good and he did really with them on, a few shakes didn't loosen anything and the wings held strong as he walked around the store. I'm glad I made them detachable because it's a lot easier to keep his vest on and just pull the wings off when he heads for narrow spaces that could bend or possibly tear them. He's set for Halloween regardless of whether he accompanies a fairy princess or Daenerys Targaryen down the street for trick or treating. I think this process would work well for wings of any size with just some changes to wire gauge. Overall I consider it a success!