Pages

Saturday, October 11, 2014

Create Your Own Spider Dog

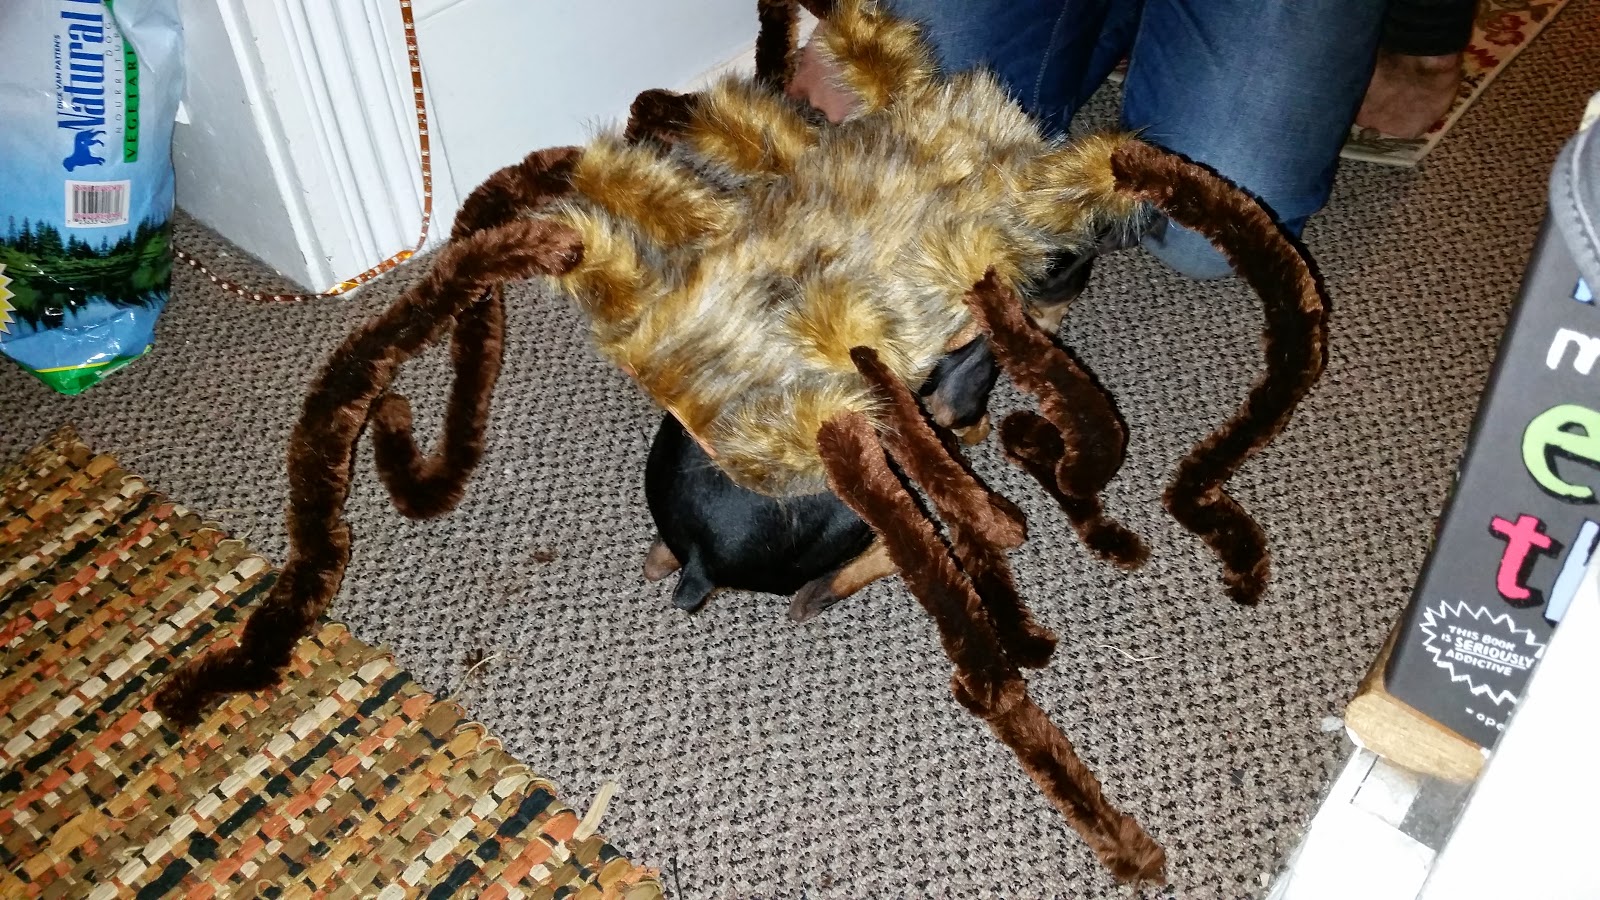
Inspired by this hilarious prank video I decided to make my very own Spider Dog this Halloween for the local dog costume contest. Luckily my little Min Pin, Starla, is a good sport and she let me create an extravagantly ridiculous outfit for her.


So if you have a dog that will let you put it in giant costumes and you've always wanted to scare the neighbors then here is a tutorial on how to make your very own Spider Dog with nothing but a glue gun and a trip to Michael's craft store. Starla is 8 pounds so these directions are for a smaller dog, you'll need more felt and possibly more pipe cleaners if you've got a big dog.


WHAT YOU NEED:


1 12x18 sheet of craft foam
2 9x12 sheets of felt (*Try to aim for colors close to your dog's coat for the foam and felt)
30" strip of velcro
3 giant chenille pipe cleaners (6.5' long each)
2 9x12 sheets of fake fur OR 5 marabou boas (6 ft long)
Glue gun
Scissors
Sharpie
Packing tape
A willing dog

DIRECTIONS:


You'll need a base for the legs so take your sheet of craft foam and cut it a round cornered rectangle roughly the size of your dog's back. You want it to fit between the base of the tail and the collar.


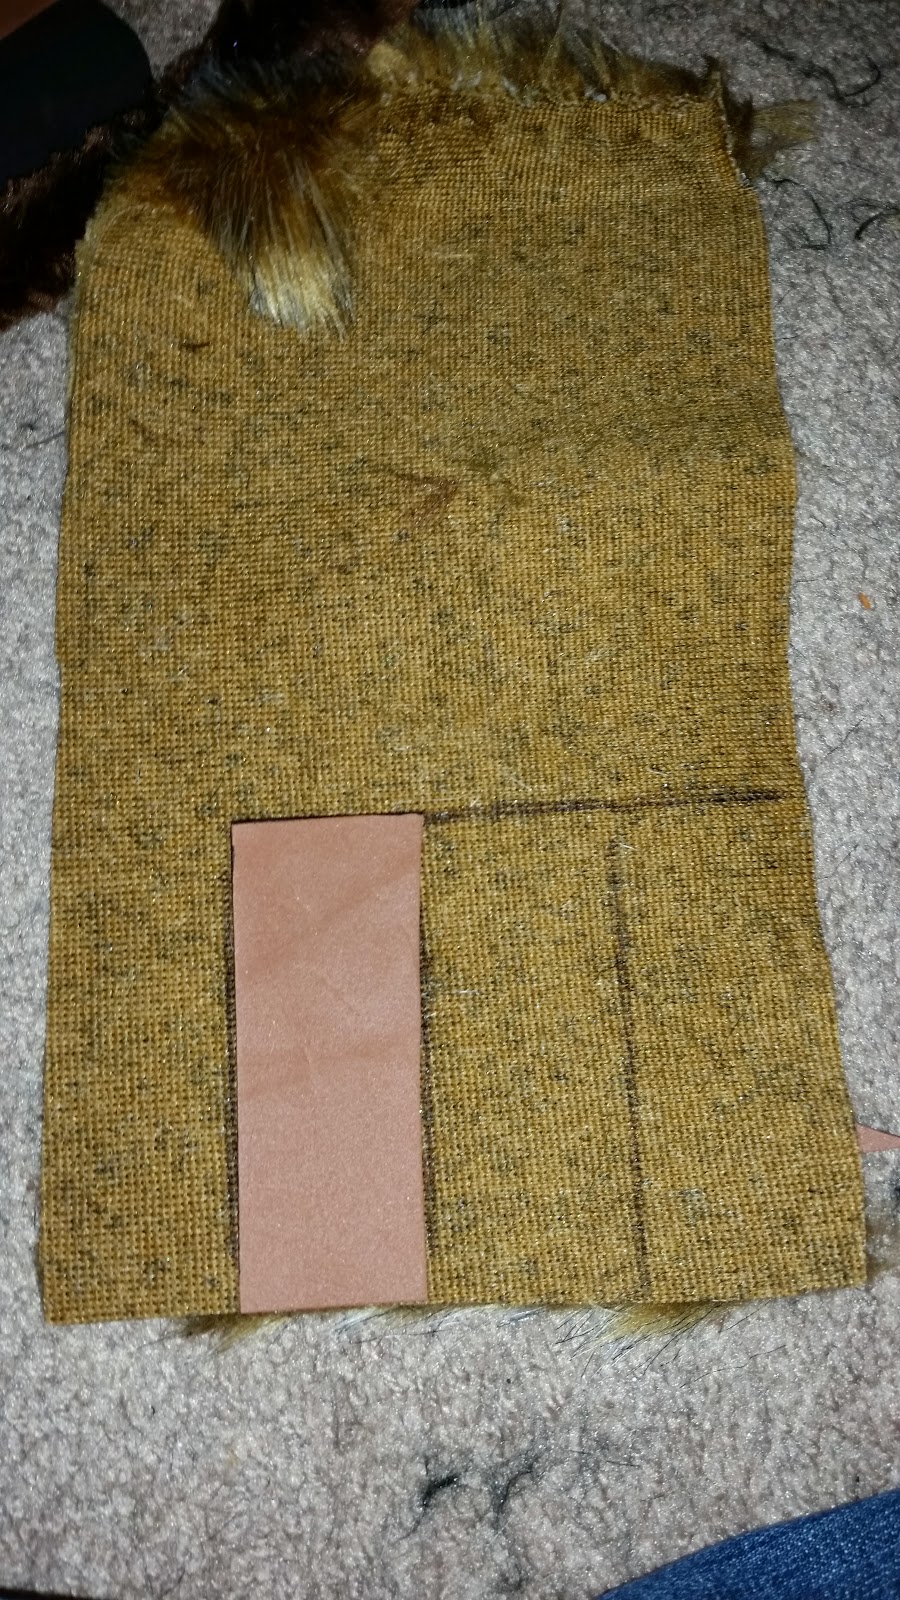
If you're using the fake fur, trace the piece of foam onto the backside and cut out a piece the same size. 

(**TIP** don't cut the fur itself, try to only cut the fabric so you don't have a rough edge)


Put 4 dots on each side roughly where you want the legs to go. You don't want them too close to the edge so the legs will stand up higher.

Cut the pipe cleaners into 3rds, you'll end up with 8 legs and a couple spares.

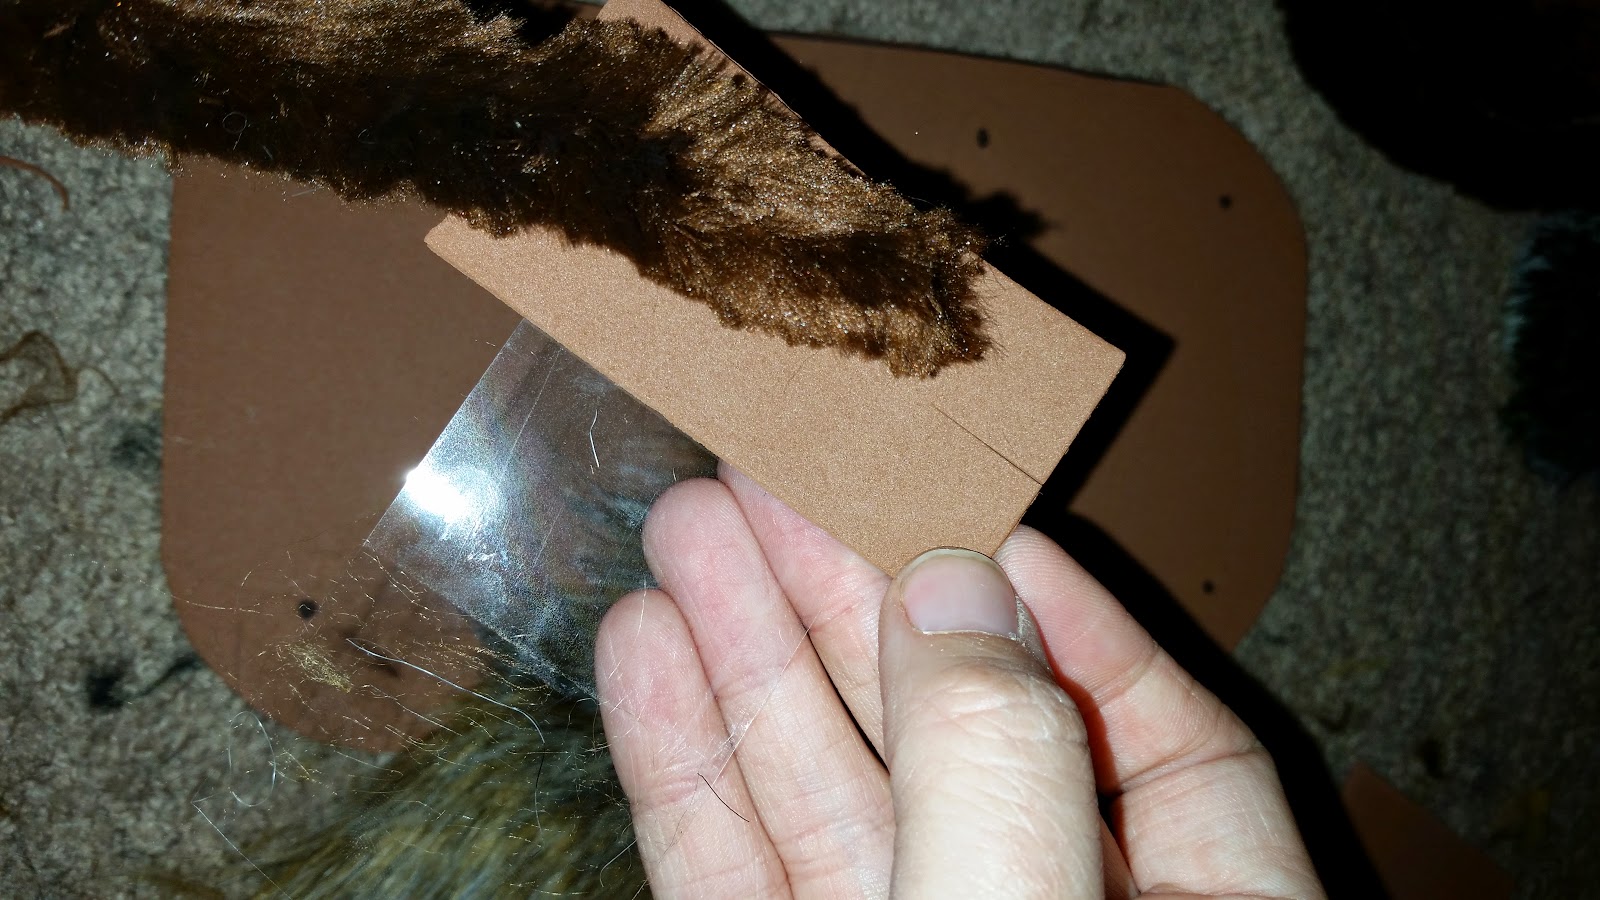
Cut 8 rectangles of foam that will be the base of the legs to give them support. The should be a few inches long and just wide enough to wrap around a pipe cleaner. Snip one end in the middle of all 8.

If using fur, cut 8 pieces the same size as the rectangles with the angle of the fur running across the short side so it will splay out when its rolled around the leg base.


Take a piece of tape longer than the rectangle is wide, and line it up with the unsnipped end. The tape shouldn't cover the snip.You're going to take one of the pipe cleaners and lay it the middle of the foam rectangle with the end flush with the snipped side.

Roll the foam around the pipe cleaner and tape it down. Don't worry about neatness, it'll be covered. Splay out the foam at the end with pipe cleaner bent out between them forming a 3 point base. Hot glue the flaps and pipe cleaner and press them over one of the dots you made on the foam base. One leg down! Go ahead and make 8 more.


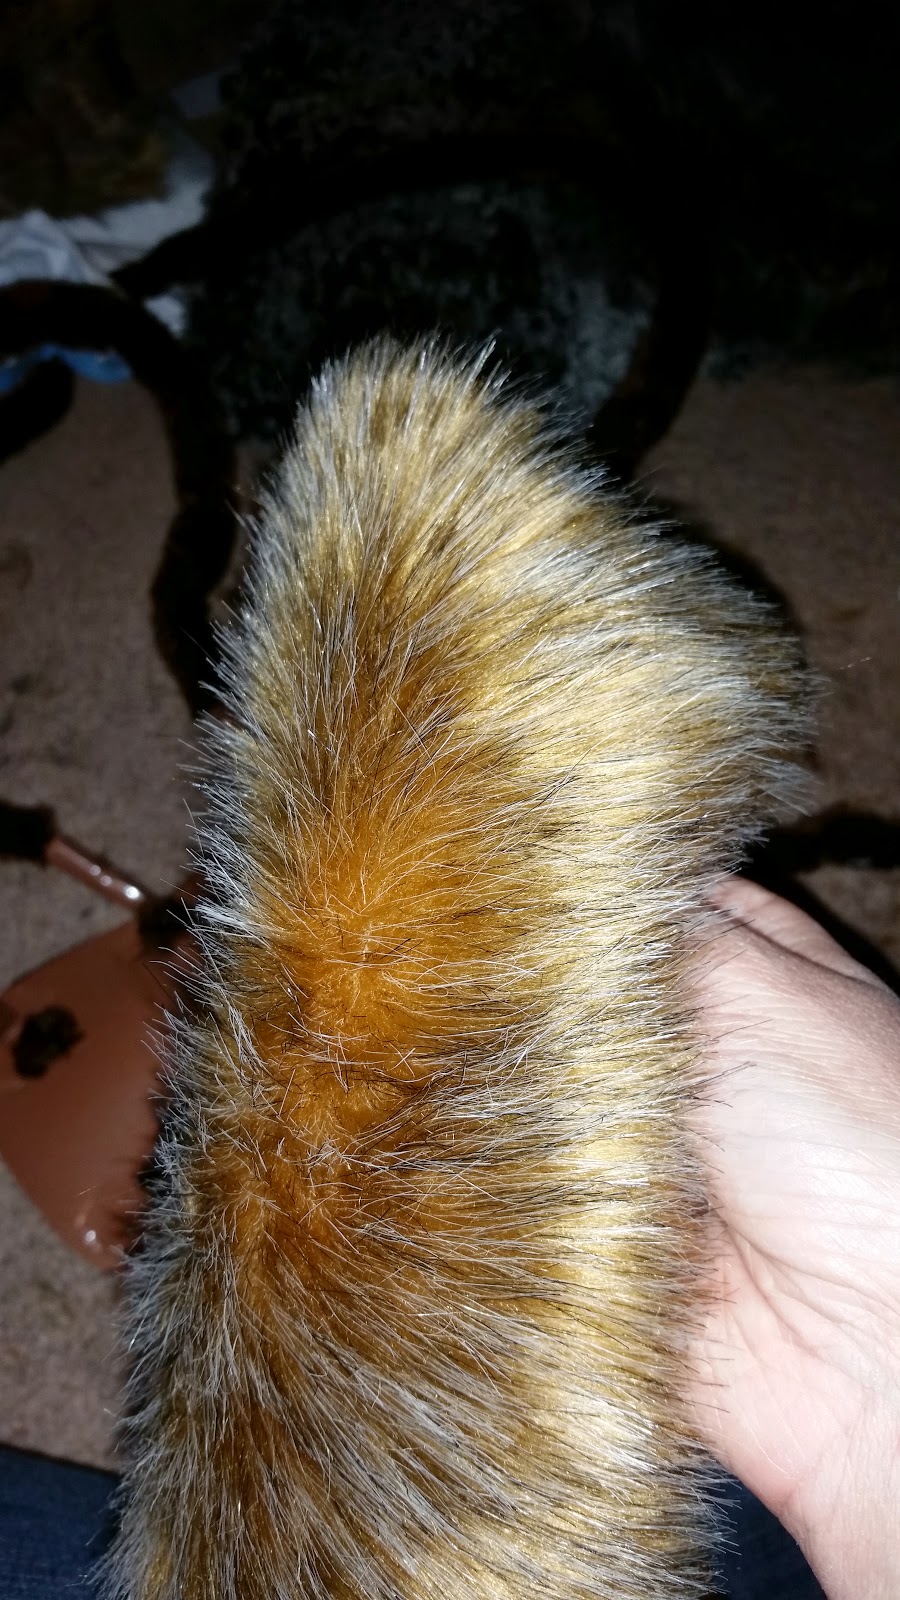
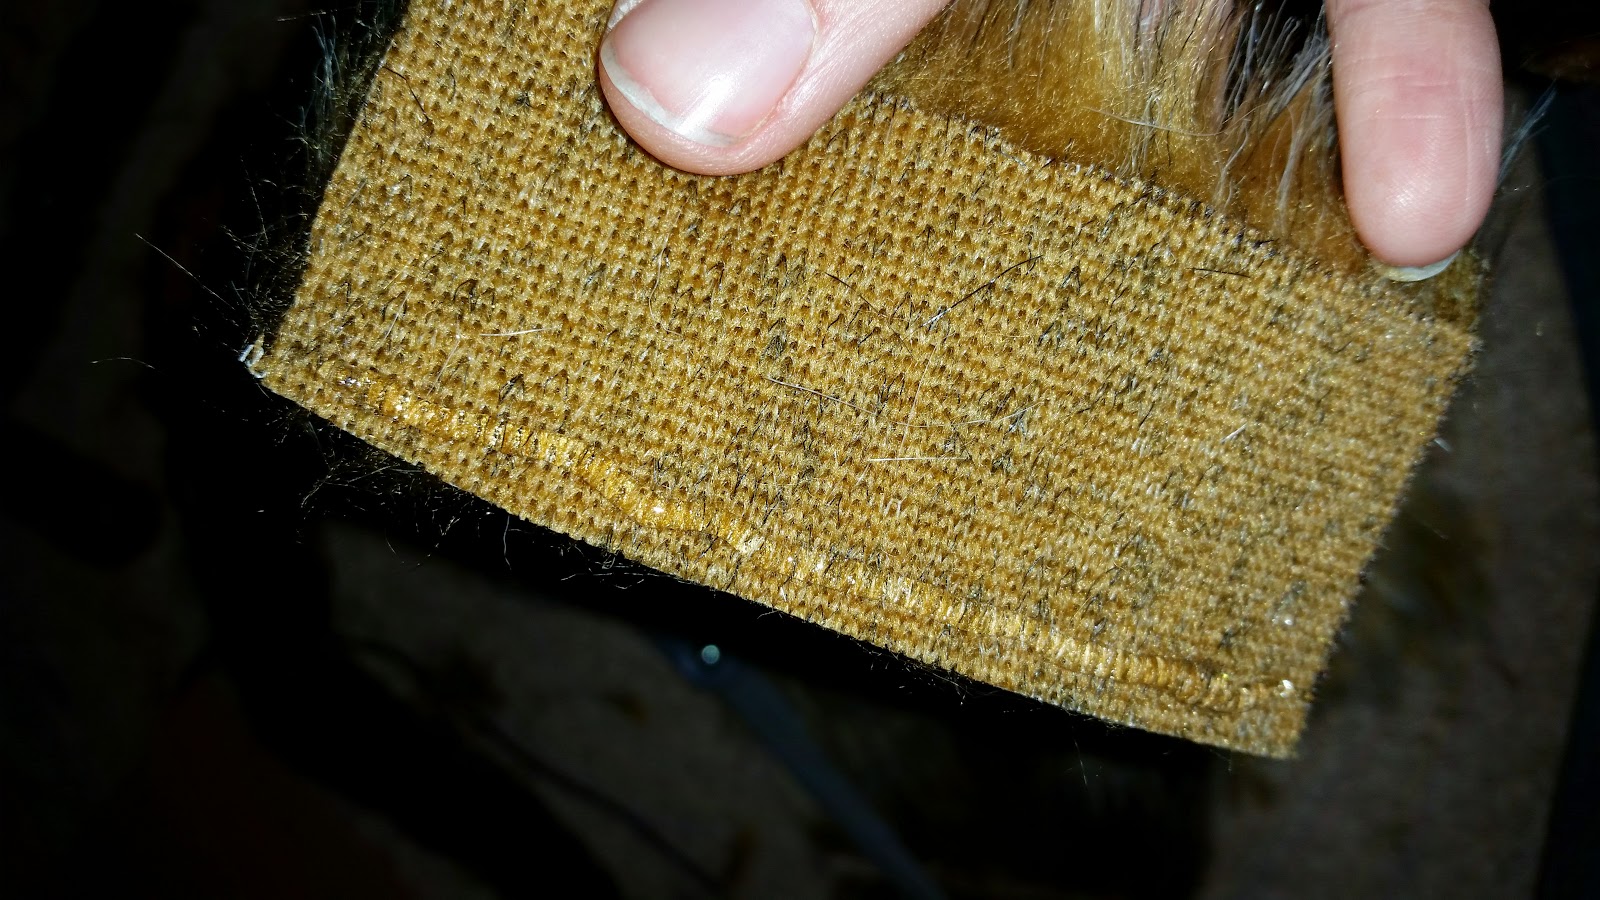
If you're using the fur, take the rectangles you cut and and hot glue a line down the long side. Press the edge on the under of a leg and wrap the fur around the base. Glue another line on the remaining edge and pulling the fur tight, press down and close the seam. The fur will go higher than the base because you shortened them with the flaps. Repeat for all 8.


Take your large rectangle of fur the size of the base, and line it up over the back. If you hot glue a line down the center of the foam you can secure the fur to it. Estimate where the legs are and cut a line in from the side so the fur can lie on either side of each leg base. Hot glue the edges down.


If you're using the boas, find the mid point of one and put it in between 2 of the legs (going across the back, not along the side). Wrap each end tightly up the legs until they are a bit past the base. Tie and tuck the ends so the strings don't show. 4 boas will take care of the legs and cover a bit of the back. If you need to, take your 5th boa and and fill in any gaps along the back. If you create a loop at the neck end it'll make a nice fuzzy collar. Since the legs are black I added pompom feet so they'll be seen at night.


You can either hot glue the foam base directly to felt vest you're going to make or you can do what I did and make it detachable with velcro. Take the strips of velcro and cut either 2 or 3 lengths to go on the underside of the foam (keep at least 3-4 inches for the the vest). Hot glue them down lengthwise.


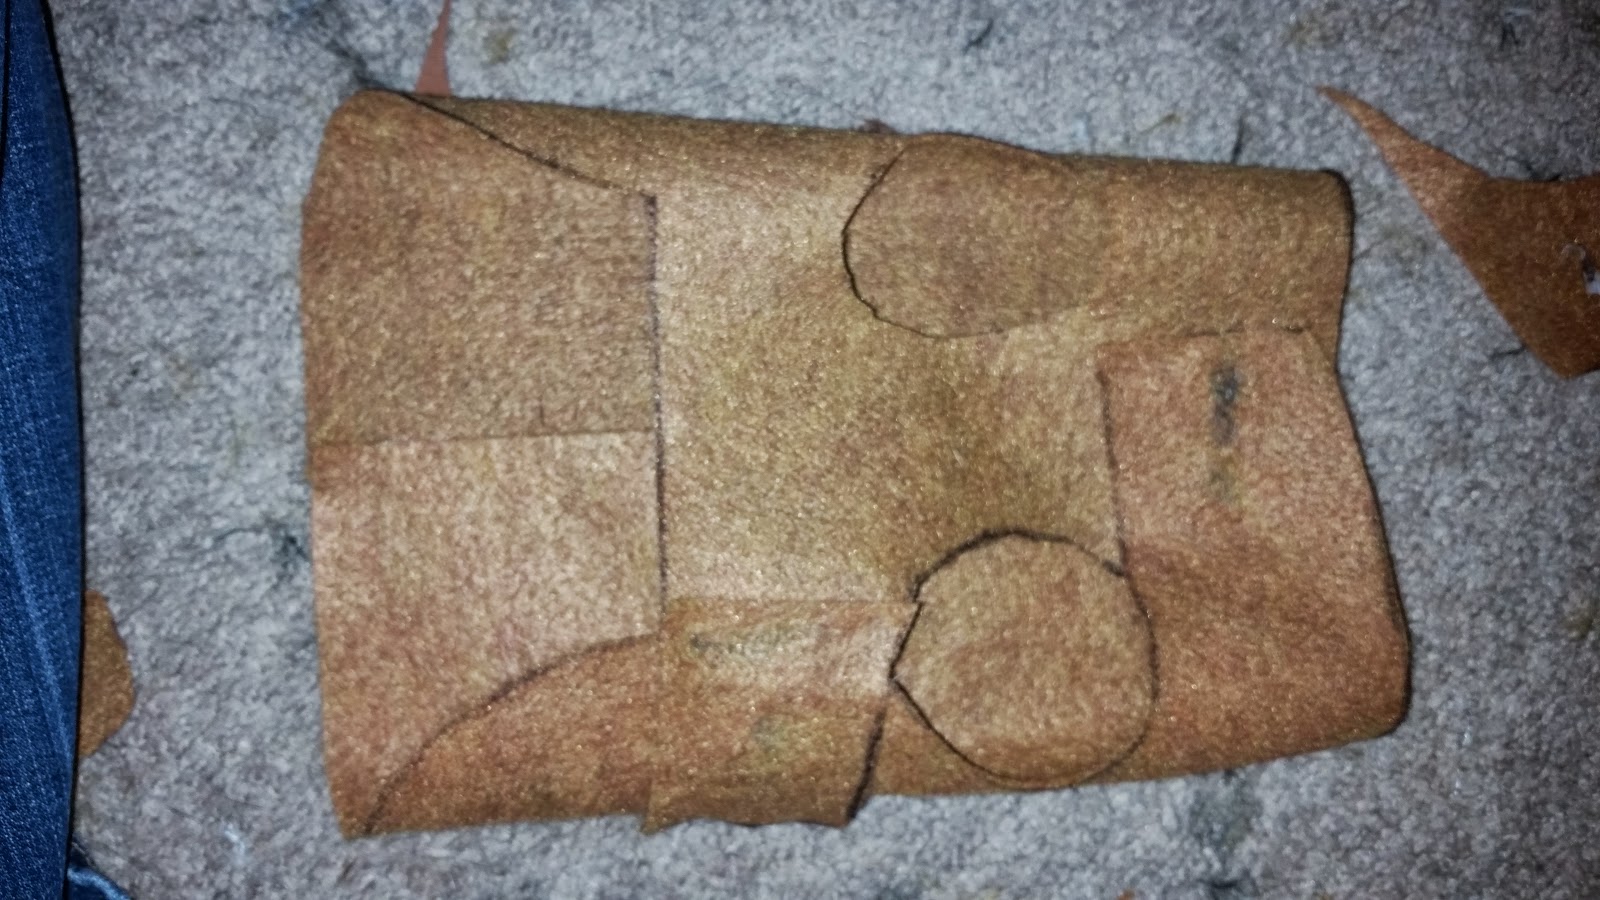
Next, we're going to make the vest. Hot glue the two pieces of felt together at the ends with a small seam.


Take a piece of clothing that fits your dog snuggly and trace it out onto the felt. I used a raincoat that laid flat with 2 points of attachment- one across the chest and one under the torso.

Use your leftover velcro for the attachment points.


Line up your leg foam base on the back of the felt vest and glue the opposing velcro strips down to the felt.


Now is the time to make adjustments to the legs so grab your willing dog and strap it in the costume.


You want the legs to have a good arc so make sure they go straight up as much as possible before falling to the sides. You can make a joint bend to keep the ends from tangling under your dog's feet. Trim the ends so they're close to the ground but won't tangle or trip.

And ta-da! You are done! You now have your very own spider dog.


Wednesday, October 1, 2014

Tis the Season To Be Scary: Part I

While some mourn the end of summer there are those of us who jump into October with gleeful anticipation as stores fill their aisles with skulls, bats, and pumpkins. Whether your brand of Halloween scary leans towards Hocus Pocus or Rob Zombie it is amazing all the options for Halloween that go beyond orange and black. Even Pottery Barn is getting in on the holiday spirit and decking their windows in full sized skeletons and beautifully painted fake pumpkins. So much inspiration everywhere for my Halloween party yet the spark I got for this year wasn’t found in the hallowed aisles of Michael’s craft store but instead buried in a trunk at my grandparents’ house:
WHY, GRANDMA,WHY??
I quickly texted the photo to my mother to find out if these dolls were in the house intentionally or they had somehow snuck into my grandmother’s room at night. Apparently they were from Germany in the 60’s and their clothes were lost in a move. She called them "cute"; I quickly reburied them under old aprons and photo albums and locked the trunk. I showed the photo to fellow Geek Girls and they all had the same reaction as I did- WTF are those?? Combine this with the “Annabelle” movie trailers starting to pop up and my 2014 Halloween party décor theme was born…

Just a pile of heads...
So by mid-September I was scouring eBay for creepy doll heads and loading up my Pinterest board with disturbing images of all the nightmare-inducing decorations one can make with dolls. By the time the last of my freaky purchases arrived I had several boxes of heads spread around my living room.

Try waking up from a nap on a couch to this

They range from the old blinking eye ones with chipped paint and blank stares to cheap plastic faces from craft stores in the 70’s. You truly can find anything on eBay but I drew the line at a haunted doll named Michael that the seller is pretty sure is inhabited by the spirit of a 5 year old killed in a house fire. My luck has been bad enough lately, no need to spit into the face of fate.

WITHOUT a haunted doll
Kelly and I pilgrimaged to the dollar store and Walmart one night looking for the cheapest of cheap dolls. Basically nothing says that more than a $1 Barbie knockoff that you don’t even really need to pry the limbs off, they just kind of fall off on their own. My favorite find was a weird looking baby doll that managed to crossover quite well with a decorative skeleton so I started happily popping heads off in the car and the skele-babies were born:
A vast improvement
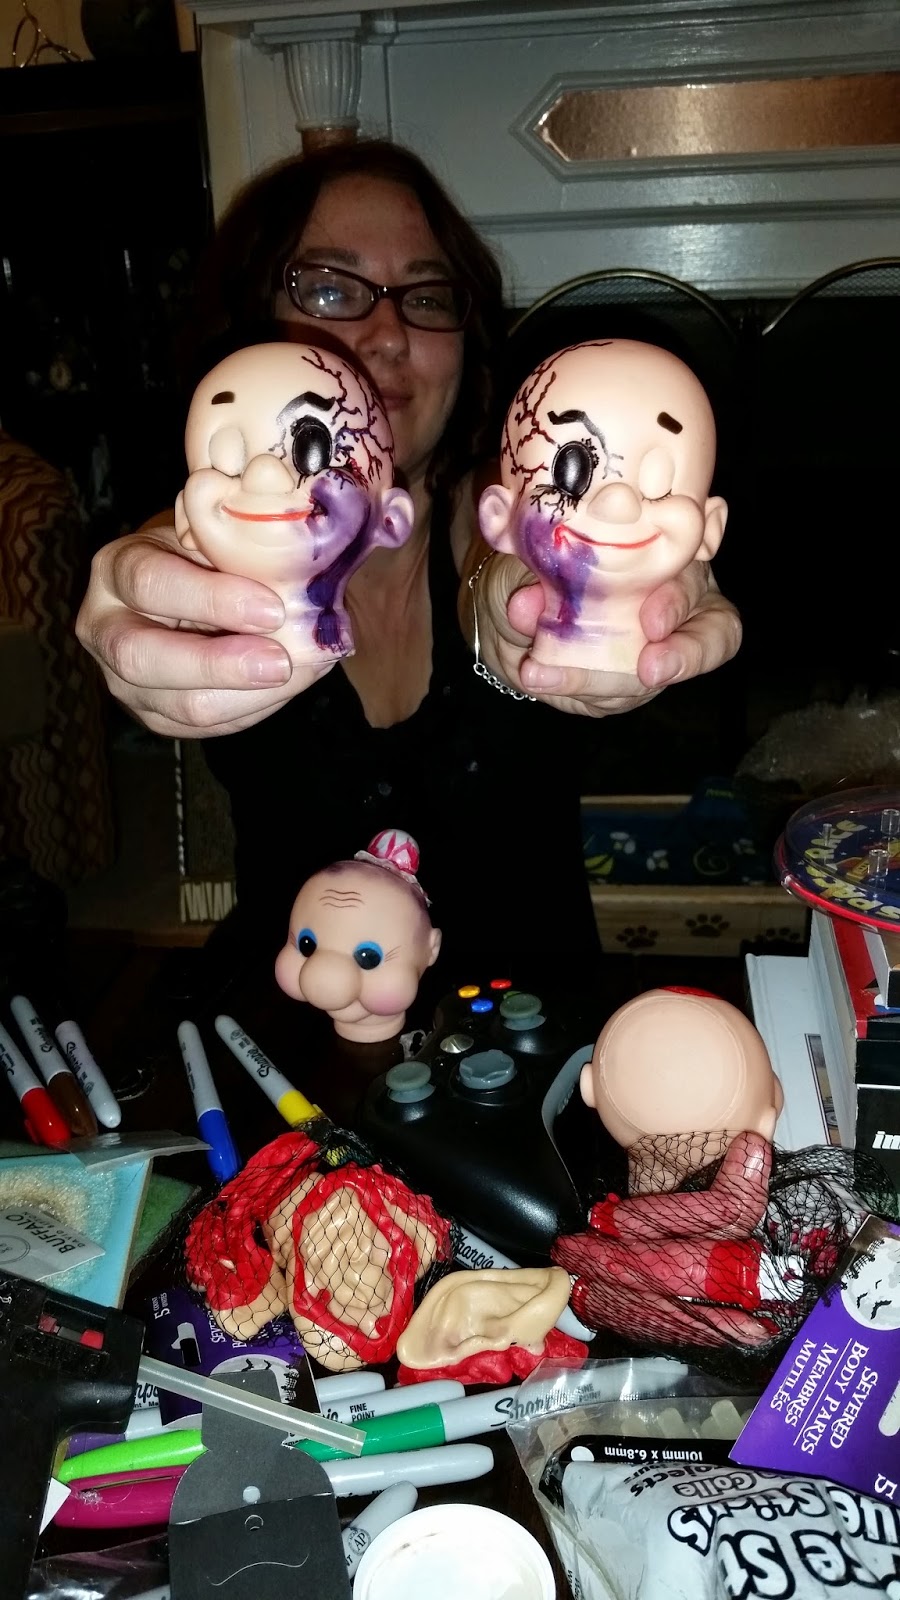
I dumped sharpies, buttons, and hot glue sticks out on my coffee table and Beth and I began to dig through the pile of cheap plastic doll heads. We separated out those that are more goofy than creepy and got our twisted creativity on. Our first session produced some good results: 

Beth getting her freak o

Living out their Halloween Destiny


As we prepare more over the month I'll keep updating on our progress and hopefully things will come together horrifyingly. Hopefully my landlord won't need to come over anytime soon because an apartment full of mutilated dolls may not get my lease renewed...

-Geek Girl Friday

Wednesday, August 20, 2014

Finally Recovered from San Diego Comic-Con


So before some of my fellow Geek Girls get on planes to head to Dragon-Con, I wanted to take the opportunity to talk a little about San Diego Comic-Con!

For those of you not familiar with Comic-Con, it is an overwhelming four-day pop culture extravaganza!  You want to see your favorite TV celebs (they are there...in an upcoming post), want to see upcoming movies, love urban vinyls, cosplayers, or just crave a serious lack of sleep or personal space...then Comic-Con is the place for you!

For now I will end this post short with some pics of the banners for ongoing/upcoming shows, movies, and just a taste of the sights in beautiful downtown SD.

To check out more photos (as I am able to get them up...stupid day-job) click here. 

Til next time geek-ettes!  --Heather


Line to get into the exhibit hall in the morning.
Walking Dead booth...can't wait til October's premiere!!!

City-wide and exhibit hall banners


Friday, August 8, 2014

Evil Clown Autopsy Buffet: The Tutorial

With Halloween around the corner its time to get the creative juices flowing and start thinking of ways to gross out your party guests. As I pondered this last year I flipped through Pinterest and Halloween DIY sites for inspiration. I saw a lot of food turned into extracted organs (you can even buy your own brain shaped jello mold) and it got me thinking... what about the actual autopsy?

I needed a body.

A body under a sheet... open cavities for various dips... I started brainstorming. I tend to come up with an abstract idea and sort of work out the details as I go along, it makes for some pretty good lightbulb moments. I decided that I didn't want to conceal the whole body and maybe it could be an alien autopsy or something like that. I went to my nearest Halloween store and wandered the aisles looking at costumes trying to figure out if I wanted alien hands or monster hands sticking out from under the sheet.

Then I saw them.

I knew exactly what I wanted to do the moment I spied those oversized red shoes. Afterall, what's scarier than a clown? An evil clown, that's what. And what's the best kind of evil clown? A dead one.

I snatched the shoes and gleefully skipped down the aisle to the mask section. My clown needed a head peaking out from under the sheet. And oh did I find the perfect mask...


Ain't he beautiful?

Not only was he creepy as hell but he also already had a beautiful lobotomy scar already in place that I could cut around and fit a little bowl of salsa in. Sick sick sick. I loved it.

And that is how the Evil Clown Autopsy Buffet was born. If you would like to make one yourself or if you have another cadaver in mind to be your buffet here is a how-to guide on making the centerpiece of your Halloween party.

Making an Autopsy Buffet

What You'll Need:
Fillers- spare towels, clothes, sheets, socks, plastic shopping bags
Masking tape
2 banquet sized table clothes (white)
At least 3 bowls (stomach, chest, and head sized; clear plastic works best)
Full head mask (the creepier the better- clown, alien, zombie, Dick Cheney)
Shoes or novelty feet to match the head theme
Large, plastic skeleton ribcage

Making The Body
You'll want to do this ahead of time to give yourself room for error, aim for a few days before the party at the very least.
  1. Measure the area that is going to be your autopsy table whether its a dining table, counter, or side table. You want to make sure your body isn't too long or wide. Mark out on the floor with tape the dimensions of the table.
  2. Place your 3 bowls roughly where the head, chest, and stomach are going to be. The one for the head should be deep and big enough to fit snugly inside the mask. The chest bowl should be more oval (I got a cheap plastic one at Party City) and the belly should be like a medium sized punch bowl no wider than what you want the torso to be.
  3. For autopsies the chest is cut open and the ribs are split so take the plastic ribcage (mine came in a bag of cheap, crappy skeleton parts) and if you need to, cut it up the middle through the sternum. Tape them to the outside of the chest bowl, splayed open enough for people to reach in.
  4. Start rolling up all the towels and sheets you have and place them around the 2 torso bowls creating a rough outline of the body and limbs (don't worry about the feet, hands, or head just yet). Keep in mind it will be under a sheet so it doesn't have to be perfect, you're just look for proportions. Fill a shirt or pants with them if you need a better guide.
  5. Now its time to use a LOT of tape! You're going to wrap it around the body you have laid out to give it structure and secure the bowls, not forgetting to tape underneath it too. I found masking tape to work the best, its easy to correct errors and is softer if you need to reshape. No need to be stingy, I used nearly a whole roll to get the shape I wanted. *Make sure it's not too flat! When the body is rounded it looks better under the sheet.

You should now have a sturdy body that you can pick up and move to your autopsy space or out of the way.

Head, Hands, and Feet
You might want to do this when you know you aren't going to have to move the body off the autopsy space, day before the party is good.

  1. For the head you'll want a full mask- one that doesn't just cover the face but slips over the whole head. If you need to, trace the width of the bowl you'll be using for the head where you want the lobotomy hole to be when the head is lying down, facing up. You can either cut and remove the whole circle or cut it like a flap with the back of the head pulled over the face.
  2.  Once you put the bowl in the mask it will probably not fill out the face so take plastic shopping bags, dish towels, whatever, and stuff them into the gaps between the bowl and inside of the mask until the bowl feels tightly in place and mask is shaped.
  3. Roll up a dish towel for the neck and using your masking tape, secure it to the body and then to the head. Remember that your sheet will probably only expose the forehead and up so don't worry about it showing too much.
  4. For the hands you can either keep them under the sheet or if you have some cool monster hands or befitting gloves, have them poking out. Fill in your gloves with the filler or make a hand sized patty of bags or fabric and tape it into shape. Tape to the end of the arms and you're done.
  5. Depending on the weight of the shoes you'll probably want to give them a little more support by putting something a little sturdy in like wrapping paper tubes, rods, or even those boot inserts that help them keep shape. 
  6. When you put the filling the shoes, with the tubes or rods coming out,  tape them to the legs and then tape the ankles together so the feet will keep pointing up and not flop to the sides. It's a bit of a challenge but again, don't be stingy with the tape.
You now have a full cadaver ready to be gussied up for presentation.

"Dressing" the Body
Sheets can be expensive so if you don't have some white sheets lying around that you don't mind messing up I would suggest ordering these cheap, polyester, banquet sized table cloths. Easy to wash and they come in all sizes so just measure your autopsy space (The one under the body should go to the floor).
  1. The sheet under the body can be slid underneath (with some helping hands if needed) and should be long enough to cover the cabinets or table legs underneath it.
  2. The second sheet can be smaller so it just covers the body. Drape it over the body and gauge where the chest and belly bowl are. Make a cut in the fabric, either a slit, hole, or X , taking care that it isn't bigger than the bowl opening. You don't want to show the masking tape body afterall.
  3. Fold the bottom of the sheet so the feet stick out without showing the taped legs and ankles. Smooth the sheets over the hands or fold up so your gloves stick out.
  4. The sheet should be folded down from the head so just the forehead sticks out. If you want to show more of the face you can fill in the eye holes with novelty eyes, white plastic, whatever looks best for your creation.
Finishing Touches
Now that your body is ready for the party its time to fill its cavities appropriately. Go for some color contrast between the three, there are some suggestions:

Belly- guacamole, pesto, herb and cheese dip
Chest- spinach artichoke dip, hummus, onion dip 
Head- salsa, crab dip, pate

Add some complimentary touches to the autopsy if you have the space. Nestle a bowl of chips into the crook of his arm or place a bowl with the brain jello mold next to the head. Dress it up with some novelty tools whether surgical instruments or some gruesome looking prop knives and torture devices, you can even hang them on the wall behind the body or off the light fixture above your table.

If you can, hang a blacklight bulb over the body or replace the bulbs in the light fixture above with some colored ones to give everything a creepy glow. I also ran some green LED light strips under the counter around it which made those white sheets glow green which would work for an alien autopsy pretty well.

Your guests will be grossed out and absolutely love it so get creative, make it gruesome or funny, whatever works for your party theme. Nothing is too much!


Wednesday, July 30, 2014

Party Like it’s the Last Night On Alderaan…

Even the most introverted Geek Girl loves a good theme party. From a May the 4th Star Wars Marathon to a full scale Halloween bash its all about the details. Sure it’s easy to one-stop-shop at Party City and get all the themed stuff you can find but come on, where’s the fun in that? So how do you create a party people are going to talk about for years to come?


Work With What You've Got
I’m lucky enough to live in an old house with a bit of ambiance that lends itself to a spooky atmosphere perfect for Halloween (it might be one of the reasons I live there). I realize not everyone has the benefit of fireplaces, creaky stairs, or even multiple rooms to get that haunted house look. If you've got a cookie cutter studio apartment that is sparsely decorated then think of an old mental asylum or doctor’s lab. If you’re in a house that hasn't been remodeled since the 70’s then you've got yourself a Murder at the Disco theme waiting to happen. Standard American suburban home? Why not turn it into a Housewife/ Pod Person abode. By working with your home’s look you’ll save yourself money because you won’t be trying to cover up what you already have.
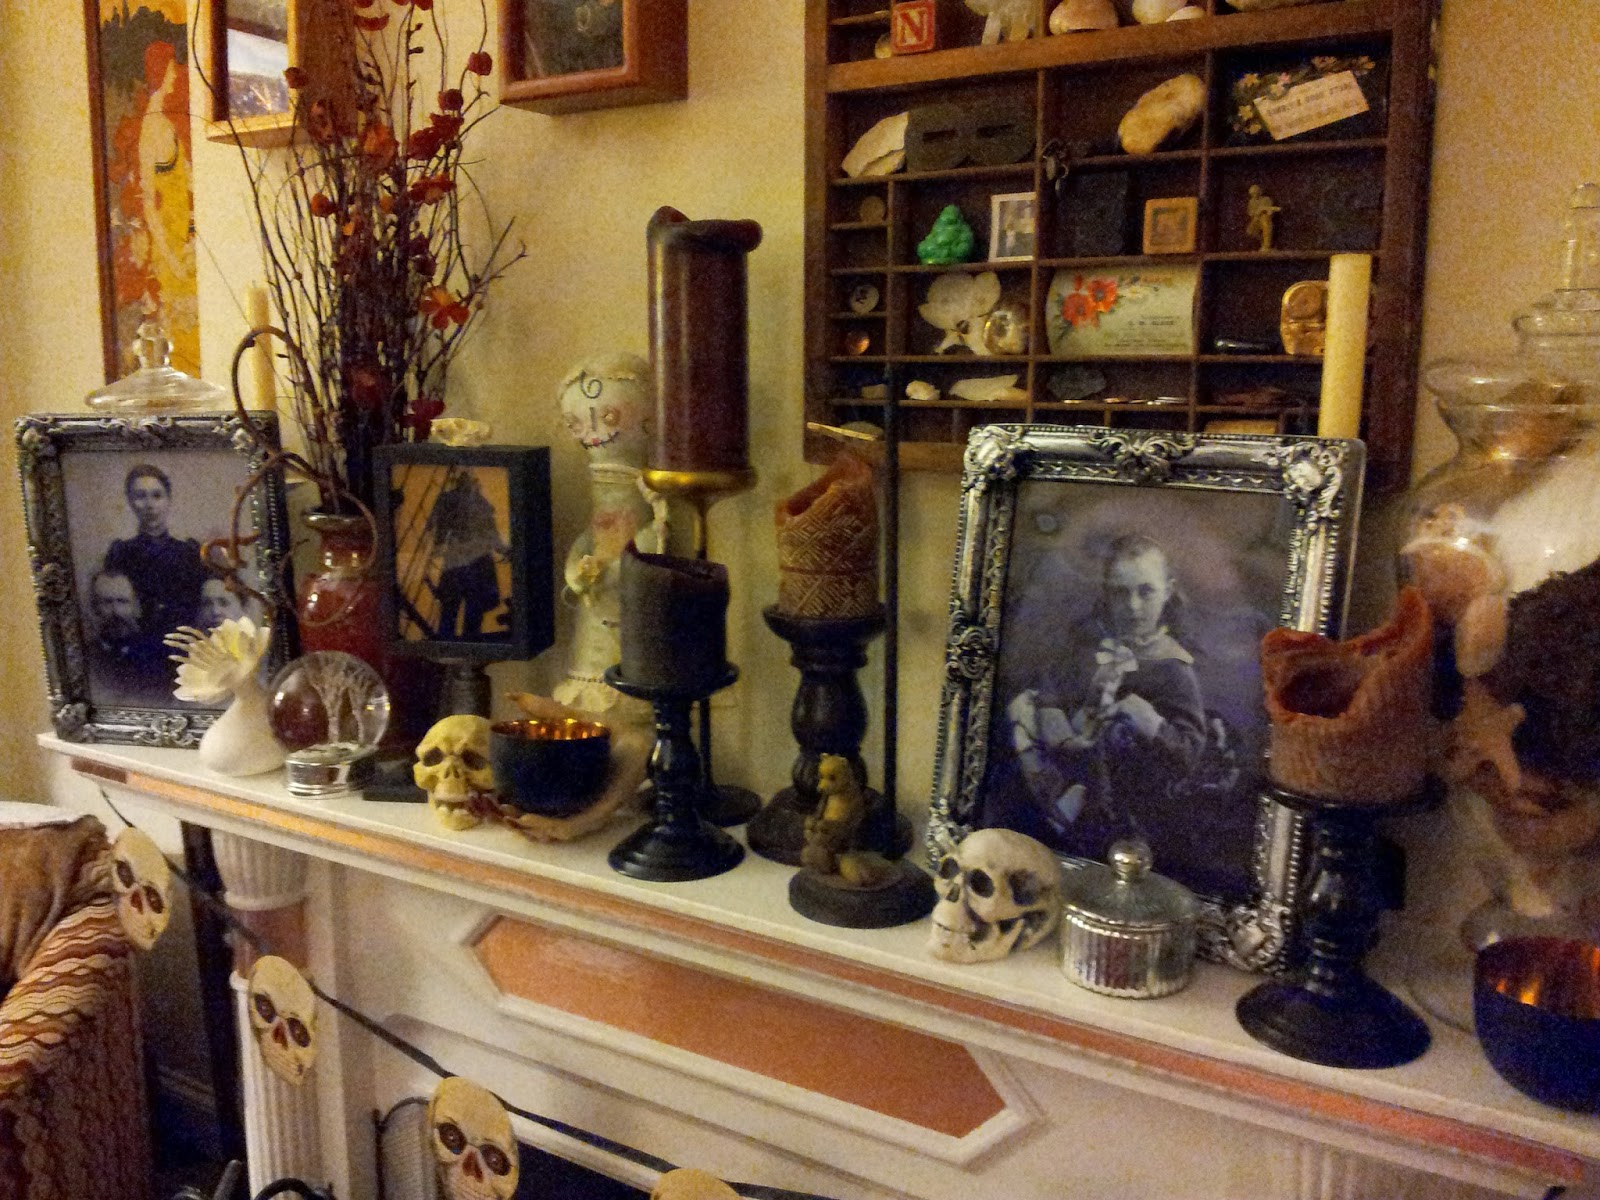
I fully admit I’ve got a bit of Cabinet of Curiosities look going on in my living room so I’ve already got an edge on Halloween. I’ve had several people go “this looks great!” then look around with narrowed eyes and say “wait… how much of this is up year round?” Busted. But I was inspired by Clue and the first season of American Horror Story to tweak my place into a creepy party venue with some scraps of velvet and lace on my side and coffee tables and putting my old ancestral photos in a more prominent position next to some candles. I also took some of my art and photos out of their frames and put in those creepy photos that change from a Victorian lady into a freaky zombie when you take a couple steps to the side. A cheap Ouija board and some old books put out and it was quite the creepy parlor.
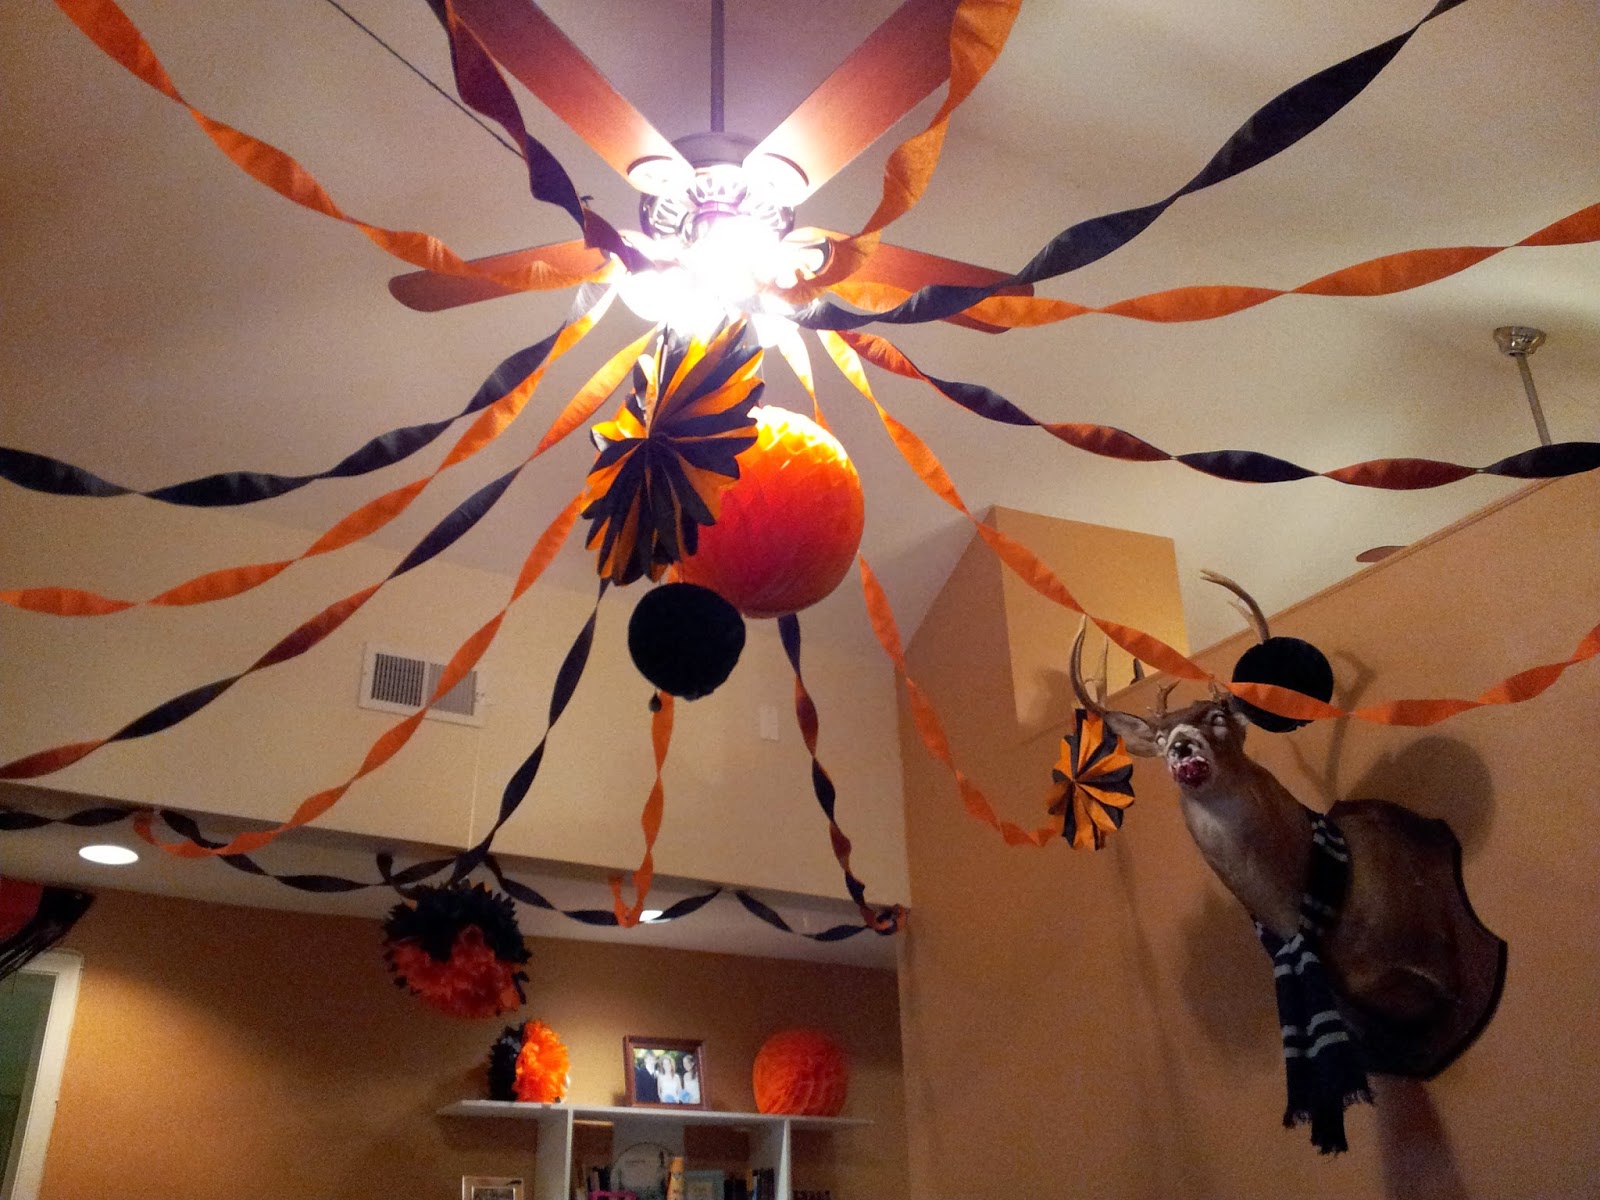
Now my neighbors who I co-hosted with have a much different taste in décor than I do. Not only did they have a more modern design to their space but they had overstuffed leather furniture and a deer head on the wall. Since their space was much more open and sparse, they didn’t like scary things, and it was not my turf, all I could think of was that it looks like a school dance auditorium with the harsh overhead lights and high ceilings at odd angles (plus they were dressing up as characters from Grease. Sigh… I know). So I worked the orange and black streamers with those hanging crepe fans and globes. I did take some license with the deer head though...

If You Can’t Make It, Invest In It
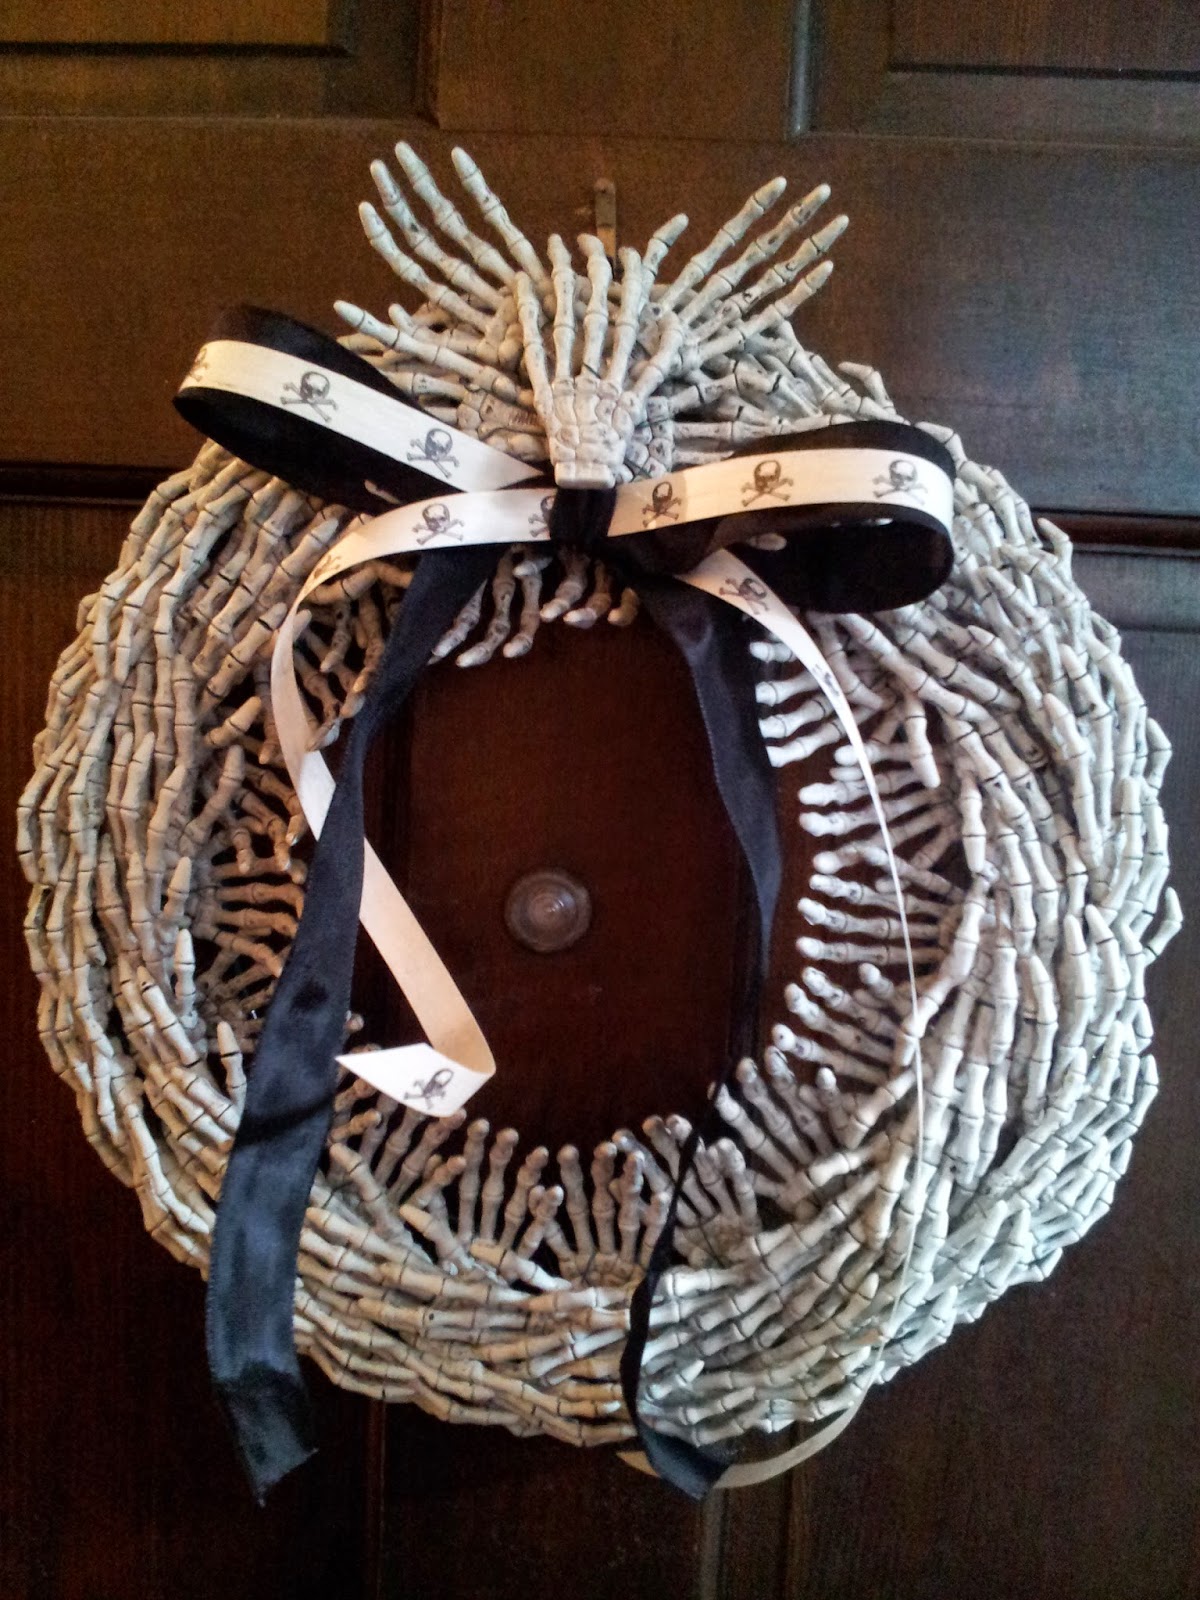
Don’t buy cheap crap. It not only looks bad but it will be junk by the end of your party and more stuff to throw into a landfill. By making my own decorations with what I have and buying decorations that aren't going to fall apart after one use I've managed to save money in the long run. I've been recycling a lot of the same decorations over the past several years for holiday parties because they hold up in storage. It may seem more cost effective to buy the cheap party in a box but a decent chunk will probably already be broken or torn when you put it up and it will be useless at the end of the night. Hit up stores after the holiday to prepare for next year or get yourself a Pinterest account and learn how to take what you have, throw some paint on it, and look like Martha Stewart. This wreath is made out of cheap skeleton hands that came in giant packs, florist wire, and a wreath frame. Cheap, sturdy, and looks pretty cool.


The Devil Is In the Details: A Taxidermy Tutorial
It's the little things that count. Whether it's throwing a creepy old silent movie onto your TV or putting some severed fingers around the dog bowl you shouldn't ignore the things that might detract from your ambiance. Embrace that elephant in the room. Even if its actually a deer.
Now the deer head in my neighbors' apartment could not just remain looking on so sorrowfully, that poor creature needed a Halloween reboot. I took a page out of Evil Dead and went to work under strict instructions that nothing could be permanent. As if that was going to stop me. 
First I made Clyde (yep, they named him) some new eyes by just taking some tissue, tearing it to his eyeball size and wetting it. The wet tissue stuck to the glass eyes and when they dried they were a freaky milky white. 
Next he needed to seem a bit more terrifying so he got a new jaw that would be far more intimidating. I started by taking some mesh wire sheets and molding around his existing jaw. That became his new upper jaw and I used the mesh to make a new lower jaw. I covered both in plaster strips and let them dry. 
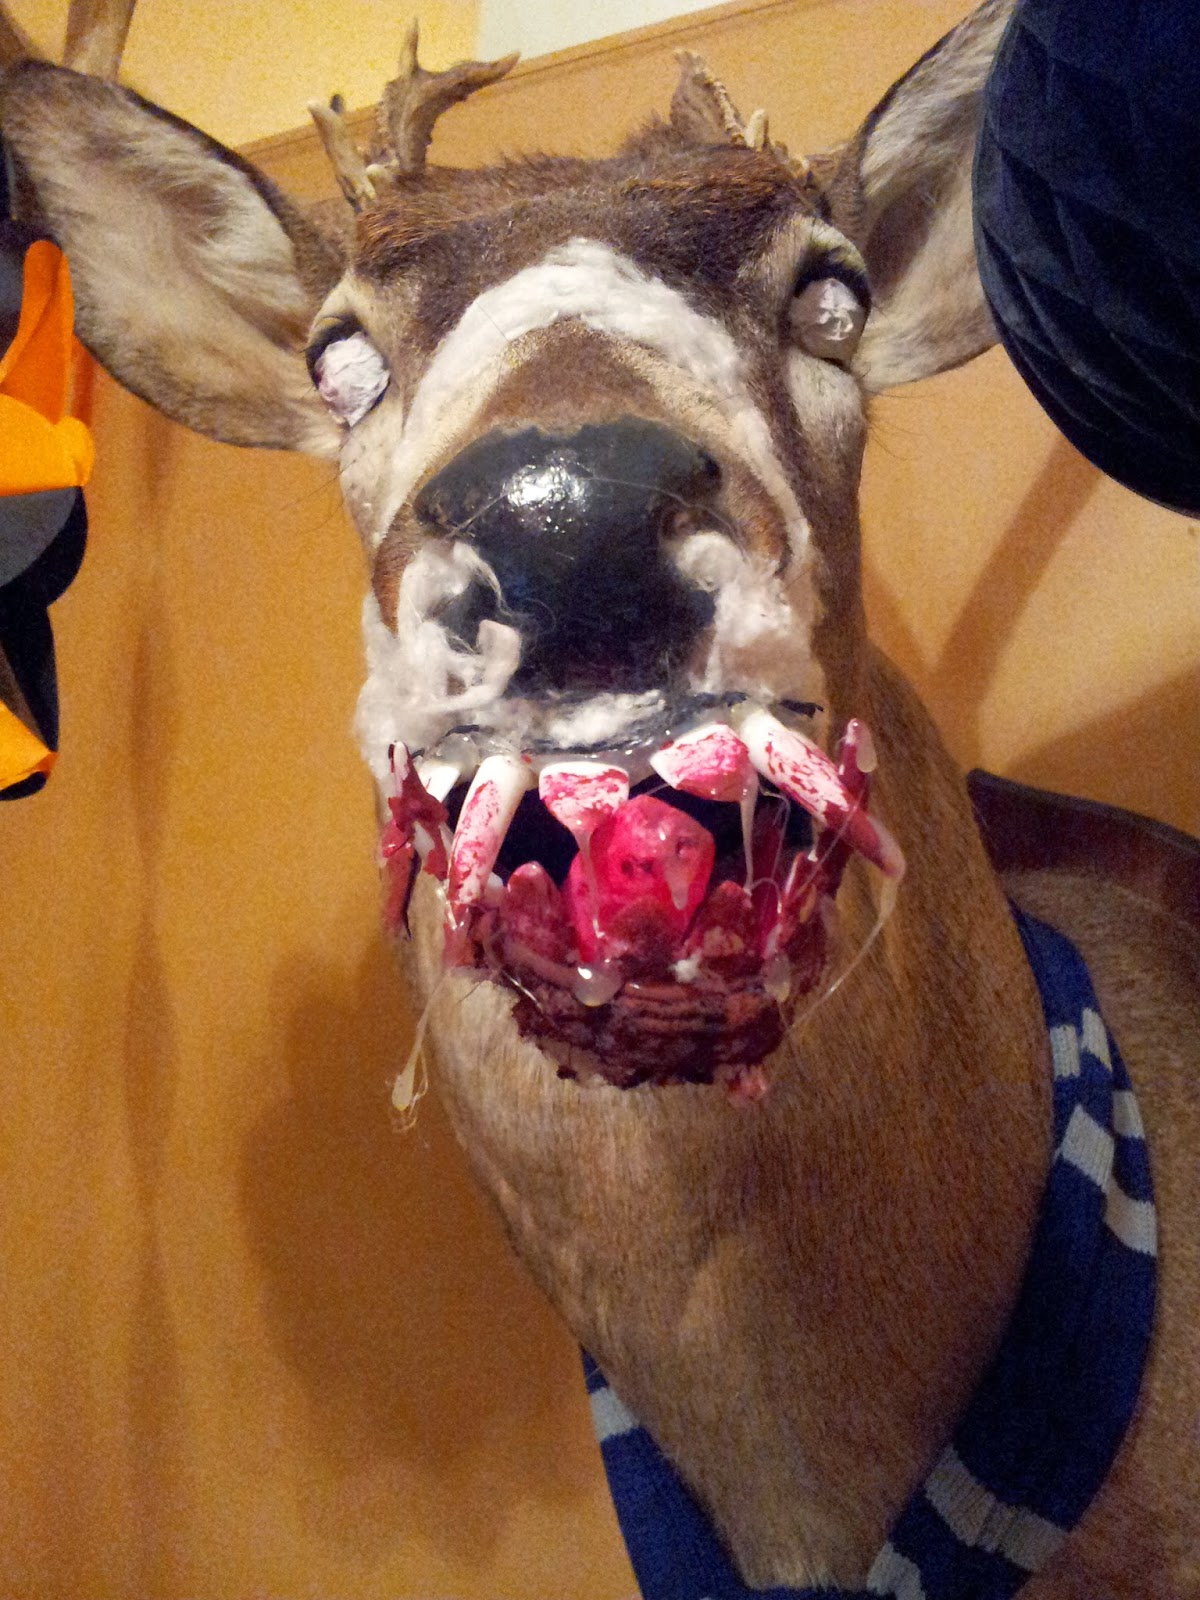
Clyde needed to look even more intimidating so he got a new set of teeth that were actually from a cheap jack-o-lantern kit. I trimmed off the bits that were meant to be screwed into the pumpkin and hot glued them at odd angles in his mouth so he had a ferocious looking snarl. I couldn’t stop there so I cut the thumb off a latex glove, rolled up the rest of the glove and stuffed it into the thumb. A little pink paint and I had myself a deer tongue. 
You know that nasty dish of sticky, flesh-colored wax you get in Halloween makeup kits that you don’t know what to do with? Well I finally found use for it by smearing the bottom of Clyde’s new jaw with and then rubbing rolled cotton over it. It stuck in tufts and made a very nice fuzzy chin.


Next I went to town with some red paint and using the hot glue to make drool drips. It was looking quite freaky but then I had to figure out how to attach it without messing up the deer (ironic, no?).  With a couple rubberbands I was able to get the new mouth to hold against the muzzle but the bands were noticeable across the bridge of his nose. I took more rolled cotton and gave Clyde some frothing that came out of his nose and back over the rubberbands. It blended in perfectly and Clyde had a whole new look perfect for Halloween without breaking the bank or ruining his face.

 Fake It With Lighting
Nothing can ruin a look more than bad lighting. When was the last time you were on a haunted house tour that was brightly lit with fluorescent lights or those big globes? Of course not, part of the scare is the lack of light and exaggerated shadows. My rule is there is to be little to no regular lighting during my Halloween parties. Flameless candles, tinted bulbs, glowsticks and LED light strips are what made my place come to life.
For Xmas and New Years I put some amber tinted bulbs in my living room, they had a very soft light and helped create the more natural but warm light I wanted in there. I wanted it to have a glow that you’d get from lots of candles without having to worry about guests setting themselves on fire so I got a lot of those flameless candles which can go from cheap one time use tealights to pretty fancy flickering ones on timers.
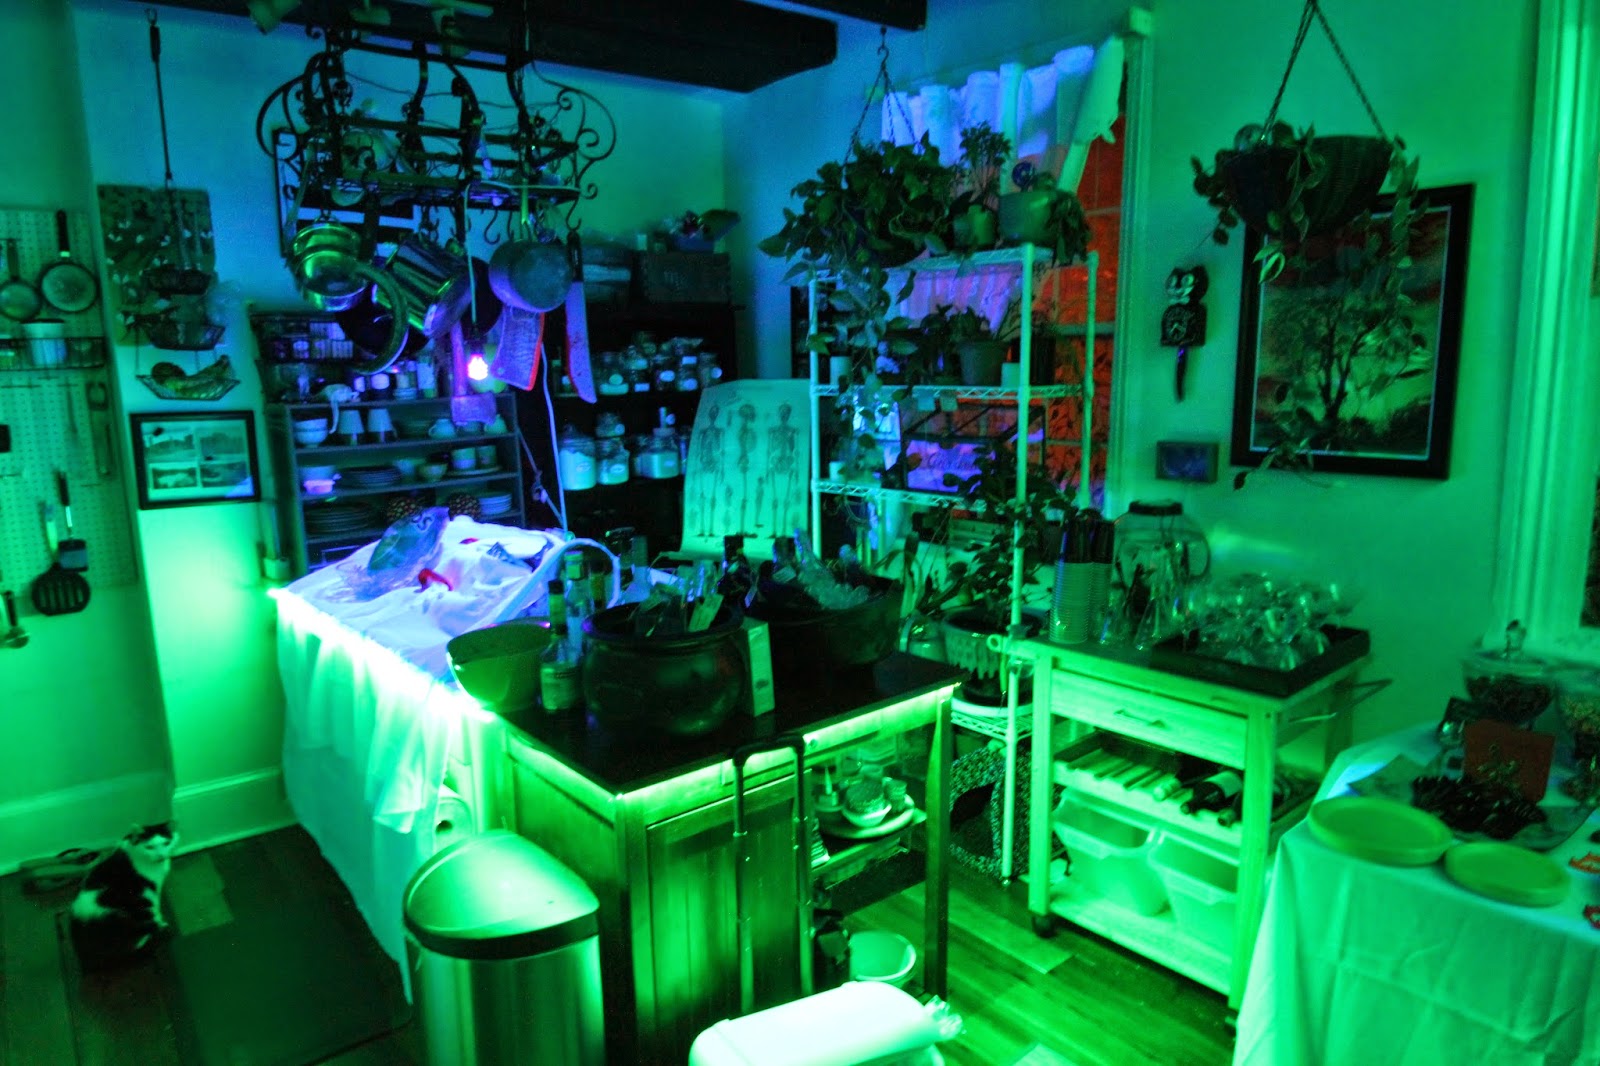
For Halloween it was all about the shadows and creepy colors. I stuck glowsticks everywhere outside. In the bushes, in between pumpkins and in the mailboxes. They go great in corners where your other lighting won’t quite reach. Plus they can give off some impressive shadows that you can’t get with bright lights. I also found LED lightstrips to be my best friend. Put under tables, under moldings or behind furniture gave a very nice glow and when run along the floor the upwards light gave everyone a very creepy look. I managed to get them in just about every room, I went a little crazy. But there is no denying they are what made my place go from good to fantastic. My kitchen could not have turned into a mad scientist lab without the blacklight making the autopsy sheets glow and the green LED strip running under the counter below the sheets. The kitchen was my pride and joy last year!

Don’t Forget The Food and Drink!
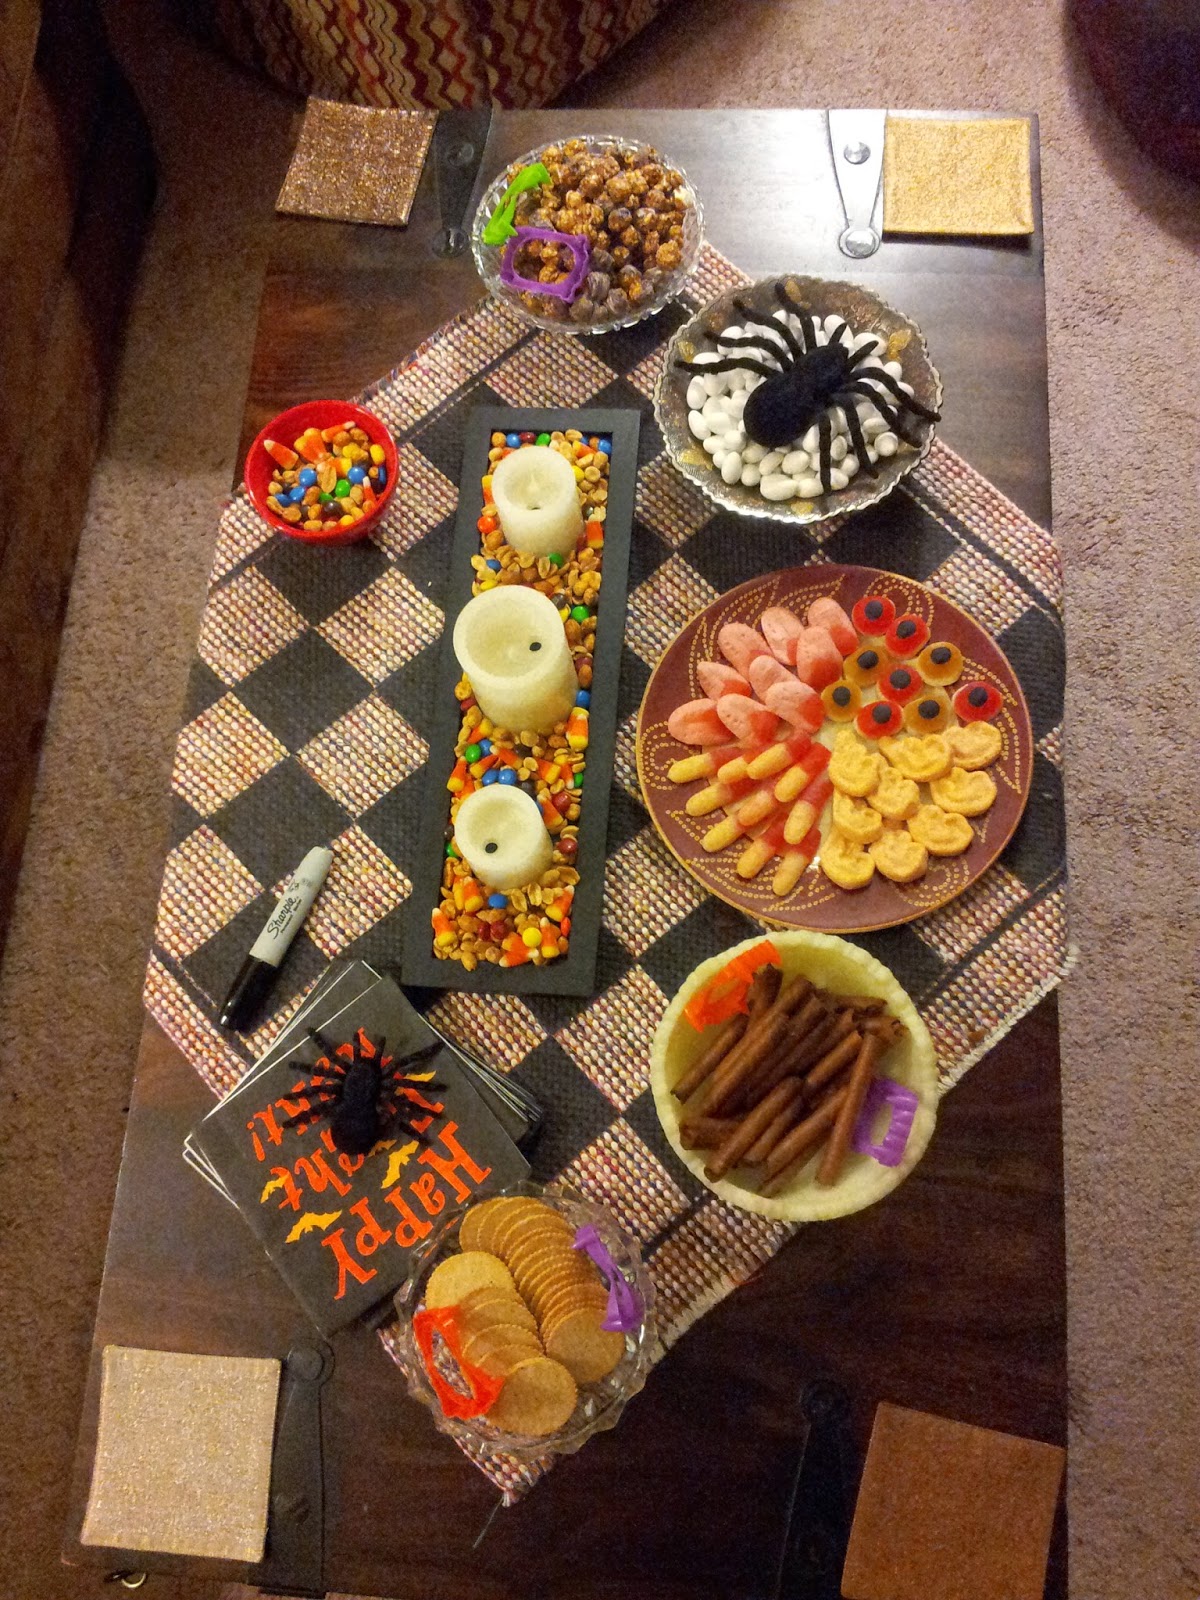
What’s a party without food? Not one you’ll get many people to. My rules for party foods are: stuff that doesn’t require utensils, won’t get stale easily, can be made ahead, and covers sweet, salty, spicy and savory. It doesn’t have to be catered or super expensive (go to places like Ross for gourmet snacks that are crazy cheap). My recommendation is to buy ½ stuff you can dump straight out of the bag into a bowl (candy corn mixed with peanuts are a huge sweet and salty hit) and the other half can be varying levels of stuff that requires some effort whether it’s the presentation or just making the food.  Let’s face it, it’s dark, people are tipsy, and nobody was going to know that I didn't make the salsa but they sure remembered that it was served out of a clown head.
I did a lot of scouring the internet for Halloween recipes and had mixed results. There was a lot of typical party food like regular mini burgers that were just called “Spooky Burgers”. Gimme a break. I was looking for something a little more than the usual with some traditional foods thrown in. I did find a recipe for eyeball cakepops, they were a hit but a pain in the ass to make. Hot white chocolate drips and burns. Sugar cookies are a little time consuming but with Jack O Lantern or Star Wars cookie cutters people will be impressed, even if you let your child (or grown adult boyfriend) decorate them with sprinkles and colored frosting. After trying some tedious recipes I have turned to the simple ones to avoid stressing out. It’s no fun being exhausted and stressed at your own party.For Halloween I had a recipe for some really spicy mixed nuts that became demon scabs, puppy chow covered in powdered sugar became ghost poop (metallic pens on black paper make great labels) and I could make them a few days ahead without much effort.
My Star Wars party centerpiece, Pièce de résistance if you will, was the most decadent Han Solo ever. Carbonite never tasted so good.


Presentation is what mattered when I made a Sarlaac pit out of hummus for my Star Wars party just by cutting a hole in the bottom of an overturned plastic bowl and fitting it to a cut off plastic cup that made the pit. I stuck some tooth picks through the cup so they pointed in like the sarlaac “teeth” and covered the rest in hummus. With some mini Return of the Jedi figures on triangle cut chips as skiffs it was pretty good and everyone got a kick out of it.


On the plate next to it was Jabba the Guac, nothing more than my plastic Jabba toy sitting in a bed of guacamole with some running down his face for good measure.  It was gross and people loved it even though all I was really serving was guacamole and hummus.


Themed drinks have become key to my parties, I think at this point people would be pretty bummed if I didn’t have them. By pre-making cocktails and pouring them into some labeled bottles nobody has to be a bartender and there’s something besides wine and beer. For my Mayan Apocalypse Holiday Party we had some candy cane cocktails as well as spicy Mexican hot chocolate for the DDs. For Halloween we’ve made candy themed cocktails: the Gummy Bear, Thin Mintini and Snickertini. One guest drained a bottle of a red colored cocktail called Vampire’s Kiss and declared it the best party ever. There are tons of drink recipes online for any kind of party theme you can imagine, go crazy. Just don’t forget to make something for the people not drinking and warn others if your cocktails are stronger than they seem (I had to snatch a deceivingly strong thin mintini out of the hand of a pregnant friend before her baby turned creme de menthe green).

So these are my most basic theme party tips to get you thinking. As I ramp up for Halloween in the next couple months I’ll post more on this year’s projects and ventures as well as a tutorial on making an Evil Clown Autopsy Buffet. Yep, you read that correctly.

Kristin
(aka Geek Girl Friday)

Thursday, June 19, 2014

Geek Girls Doing Good

This past weekend The Geek Girls Guild hosted a yard sale to raise funds for Girls Inc. What started out as a conversation about having too much crap turned into a group yard sale which turned into the Guild's first philanthropic venture.

We decided we should pick an organization that empowered girls and something along the STEM (science, technology, engineering, and math) lines. We found Girls Inc. and contacted the DC chapter to let them know we wanted to get involved. This summer they're sponsoring a CyberNinja camp to teach girls coding and another on weather and aviation so we were happy to hear that our funds would go to these awesome programs.

Despite a hot day we stood strong and spent the whole day chasing shade in the driveway and selling a decent amount of stuff from DVDs, games, clothes, and books to some really weird knick-knacks. We made sure people knew what their money was going to and they were very pleased, some even telling us to keep the change. We even had the generous offer of matching up to $200 from one of our support team members (aka a boyfriend). After a long sticky day we made out with a donation of over $600. Success!

We're very honored that we could contribute to such a great cause. A big part of the Guild is encouraging girls and women to not hesitate to indulge in their interests and passions. Whether it's comics, Star Wars, coding, or physics we hope that one day girls and women don't even have to think twice about diving head first into the things they enjoy. Hopefully we'll have more opportunities to volunteer and work with groups like Girls Inc in the future and we can keep up the momentum!